Crafting a Salted Caramel Cappuccino Without the Espresso Machine
Have you ever found yourself yearning for the creamy, sweet-and-salty perfection of a salted caramel cappuccino on a cozy morning, only to be stopped by the thought of a trip to the cafe or the lack of an expensive espresso machine at home? You’re not alone. The desire to recreate cafe-quality drinks in our own kitchens has become a global phenomenon, with the popularity of DIY coffee drinks and at-home barista culture surging. In fact, caramel, particularly in its salty variation, is one of the fastest-growing beverage flavors, a trend driven by consumers’ desire for unique and indulgent experiences.
This article is your comprehensive guide to mastering the art of making a delicious homemade cappuccino with the irresistible salted caramel twist, all without needing to invest in bulky, high-tech equipment. We will walk you through everything from the essential tools and ingredients to the step-by-step process of creating your own salted caramel syrup from scratch. By the end of this guide, you will have all the knowledge you need to craft a perfect, frothy, and flavorful cappuccino that rivals anything you’d buy from a coffee shop, all from the comfort of your own home. Let’s embark on this delightful journey to create coffee magic, without an espresso machine.
The Allure of Salted Caramel Cappuccino-
The salted caramel cappuccino is more than just a coffee drink; it’s a sensory experience. The secret to its enduring appeal lies in the perfect marriage of flavors and textures. The rich, slightly bitter flavor of a strong coffee base meets the buttery, sweet notes of caramel. The magic, however, is in that final, crucial element: a pinch of salt. The salt doesn’t just add a new flavor; it elevates the others, cutting through the sweetness and bringing a deeper complexity to the caramel, making every sip a perfectly balanced delight.
This sweet-and-salty combination has been a favorite for years, making its way into everything from desserts to gourmet snacks. When it’s paired with the classic cappuccino, with its velvety microfoam and rich coffee, the result is pure comfort in a cup. It’s a treat that feels both familiar and special, which is exactly why so many people search for a cappuccino recipe no machine to enjoy this sweet and salty coffee on demand. The satisfaction of crafting this drink yourself adds a layer of personal triumph, transforming a simple morning routine into a moment of pure, handcrafted bliss.
Demystifying the Cappuccino-
Before we can create our delicious homemade cappuccino, it’s helpful to understand what makes a traditional one so special. A classic cappuccino is built on a foundation of three distinct layers in roughly equal parts: a shot of rich, strong espresso; a layer of hot, steamed milk; and a crowning layer of thick, creamy milk foam. The perfect balance of these elements is what creates the iconic texture and flavor profile we all know and love. Without an espresso machine, replicating this exact balance might seem daunting. However, the key is to focus on achieving the function of each component using alternative methods. You don’t need high-pressure steam to get a fantastic result—you just need a little creativity and the right tools.
Your Essential Toolkit-
The great news is you likely have many of the items you need to make a delicious salted caramel cappuccino already in your kitchen. Forget about the expensive machines and fancy gadgets. This is about making do with what you have to create something amazing.
For the “Espresso” Base
To get that crucial, concentrated coffee flavor that stands up to the sweetness of the caramel, you’ll need to brew a strong coffee. Here are a few excellent options that produce a robust and flavorful base:
- Moka Pot: Often called a stovetop espresso maker, this classic Italian tool brews a dark, strong coffee that’s the closest you’ll get to real espresso without a machine.
- French Press: This is one of the easiest ways to brew a bold, full-bodied coffee. Use a slightly higher ratio of coffee grounds to water than you normally would to ensure a strong concentrate.
- AeroPress: This versatile device can create an espresso-like concentrate by using pressure to force water through the grounds. It’s a favorite for many home baristas.
- AeroPress: If all else fails, simply brew a very concentrated pot of drip coffee. Just be sure to use enough coffee grounds to make it potent.

For the Creamy Milk Magic
The hallmark of a cappuccino is its thick, frothy foam. Don’t worry you can achieve this with several milk frother alternatives. The key is to introduce air into the milk to create the bubbles.
- French Press: Beyond brewing coffee, a French press is one of the best ways to froth milk. Simply heat your milk, pour it into the press, and pump the plunger up and down vigorously.
- Mason Jar: This method is simple and effective. Heat your milk and pour it into a clean mason jar, screw on the lid tightly, and shake it for 30-60 seconds. The milk will double in volume and become a nice foam.
- Handheld Whisk: If you have some muscle, you can manually whisk hot milk in a pot until it foams. It’s a bit of a workout, but it gets the job done.
- Handheld Milk Frother: This is a low-cost, battery-operated gadget that can froth milk in seconds, making it a worthy addition to any home coffee bar.
For the Irresistible Salted Caramel
This is the fun part! You can buy pre-made sauces, but making your own homemade salted caramel syrup is surprisingly simple and incredibly rewarding. For this, you’ll need just a few ingredients:
- Granulated white sugar
- Heavy cream
- Unsalted butter
- Sea salt (or kosher salt)
With these tools and ingredients, you’re fully equipped to create a spectacular salted caramel coffee drink without ever stepping foot in a cafe.
Your Homemade Salted Caramel Syrup (Step-by-Step)
While you can always use a store-bought version, making your own homemade salted caramel syrup is a game-changer. The flavor is richer, the texture is smoother, and the satisfaction of knowing you created this delicious concoction is unmatched. Plus, it’s surprisingly simple to do! This DIY salted caramel syrup will become your go-to for all kinds of coffee drinks and desserts.
Ingredients and Equipment
Ingredients:
- 1 cup (200g) granulated sugar
- 1/2 cup (120ml) heavy cream
- 1/4 cup (57g) unsalted butter, cubed and at room temperature
- 1/2 teaspoon sea salt (or to taste)
- 1/4 cup water
Equipment:
- A medium-sized, heavy-bottomed saucepan
- A heat-safe whisk or wooden spoon
- A glass jar or airtight container for storage
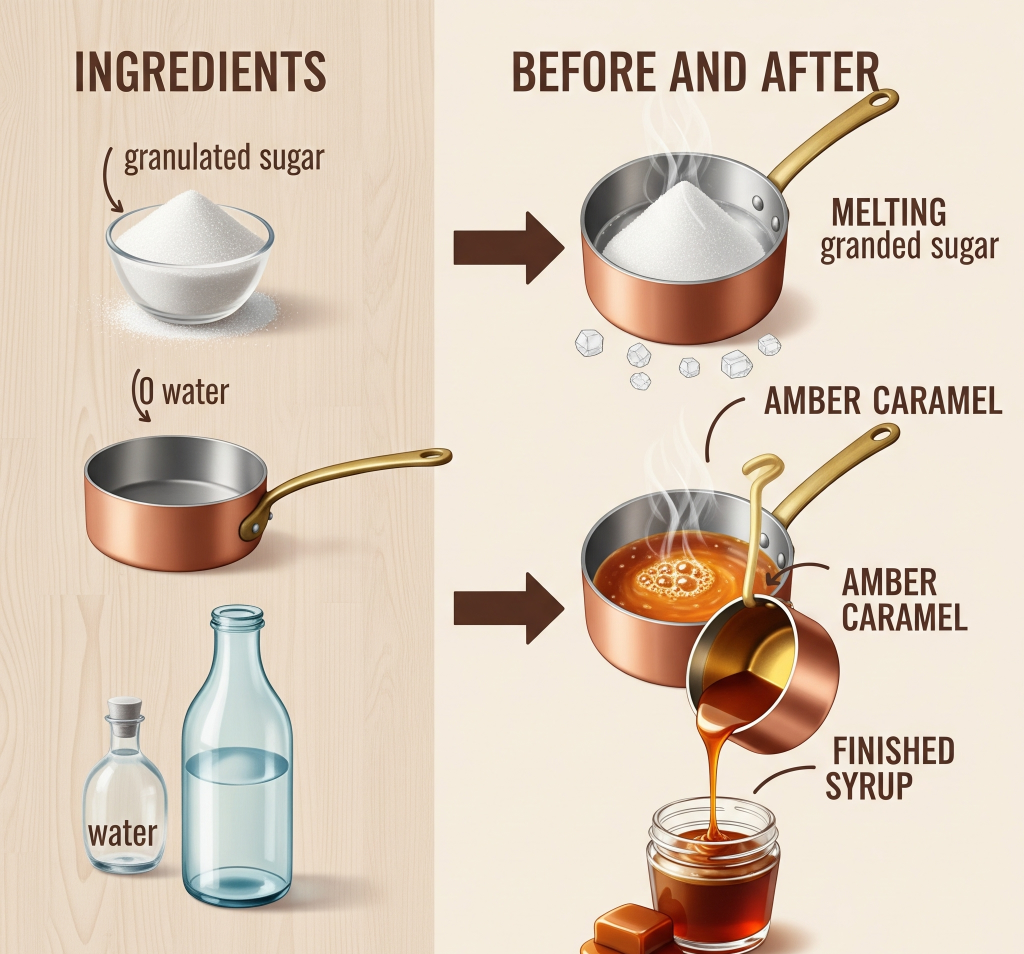
Easy-to-Follow Steps for Perfect Syrup
- Melt the Sugar: In your saucepan, combine the sugar and water. Place the pan over medium heat. Stir occasionally with a wooden spoon or whisk until the sugar is completely dissolved. Once it’s dissolved, stop stirring.
- Watch it Caramelize: Let the mixture bubble and simmer. It will first become clear, then a light straw color, and finally a beautiful amber hue. This process can take about 8-12 minutes. Keep a close eye on it, as it can go from perfect to burnt in a matter of seconds.
- Add the Butter: Once the caramel reaches a deep amber color, immediately remove the pan from the heat. Carefully add the cubed butter and whisk until it is completely melted and combined. The mixture will bubble up quite a bit, so be careful.
- Incorporate the Cream: Slowly and carefully, pour in the heavy cream while continuously whisking. The mixture will bubble and steam vigorously. Keep whisking until the syrup is smooth and all the ingredients are fully incorporated.
- Add the Salt: Stir in the sea salt until it’s evenly distributed. The amount of salt can be adjusted to your personal preference for that perfect sweet and salty coffee balance.
- Cool and Store: Let the syrup cool in the pan for about 10-15 minutes before carefully transferring it to an airtight container or a glass jar. The syrup will thicken significantly as it cools. It can be stored in the refrigerator for up to two weeks.
With your own batch of homemade salted caramel syrup ready to go, the final step is to bring all the elements together.
The Art of the Non-Machine Salted Caramel Cappuccino
This is the moment everything comes together. With your strong coffee base and your homemade salted caramel syrup ready, you’re just a few simple steps away from a sensational homemade cappuccino. Follow this stovetop cappuccino recipe to combine the elements and create a drink that is as beautiful as it is delicious.
Brewing Your “Espresso”
- Prepare Your Brew: Choose your preferred method (Moka pot, French press, or AeroPress). Grind your coffee beans to the appropriate consistency for your chosen method. A fine grind is best for a Moka pot, while a coarse grind works best for a French press.
- Brew It Strong: Brew a concentrated amount of coffee. For a standard cappuccino, a ratio of about 1 part coffee to 2 parts water will give you the strong, robust flavor you need to stand up to the sweetness of the caramel.
- Pour and Wait: Once brewed, pour the hot, strong coffee into your favorite cappuccino mug. Don’t fill it completely, as you’ll need room for the syrup and frothed milk.
Frothing Your Milk to Perfection
Now for the magic touch! The key to making a barista-style cappuccino at home is creating rich, velvety foam.
- Heat the Milk: Gently heat your milk of choice on the stove or in the microwave until it’s hot but not boiling. The ideal temperature is around 60-70°C (140-160°F).
- Choose Your Frothing Method:
- French Press: Pour the hot milk into the press. Pump the plunger up and down quickly and vigorously for about 30-45 seconds. The milk will double in volume and become creamy foam.
- Mason Jar: Pour the hot milk into a jar, screw on the lid tightly, and shake with all your might for about a minute. Be careful, as the jar will be hot!
- Handheld Frother: Place the frother in the hot milk and turn it on, moving it up and down until you reach your desired level of foam.
- Tap and Swirl: Gently tap the jar or French press on the counter to pop any large bubbles. Swirl the frothed milk to create a smooth, glossy texture, known as microfoam.
Combining the Elements
- Start with Syrup: Add 1-2 tablespoons of your homemade salted caramel syrup to the bottom of your mug with the freshly brewed coffee. Stir to combine.
- Add the Milk: Carefully pour the hot, frothed milk into the mug. Hold back the foam with a spoon at first, allowing the hot milk to pour into the coffee.
- Top with Foam: Once the milk is in, use the spoon to scoop the remaining thick, creamy foam on top of the drink. The foam should form a beautiful, airy dome over the surface.
- Garnish: For the perfect finish, drizzle a little more salted caramel coffee syrup over the foam and sprinkle a tiny pinch of sea salt. This not only looks professional but also adds an extra layer of flavor.

Common Cappuccino Conundrums (Without a Machine)
Even with the best instructions, every home barista will face a few hurdles. The beauty of making a barista-style cappuccino at home is the opportunity to learn and perfect your craft. Here are some of the most common issues you might run into and how to solve them, ensuring you can consistently create a great homemade cappuccino.
Achieving Strong Enough Coffee
If your coffee base tastes weak or is overpowered by the milk and caramel, you need to adjust your brewing method.
- Use More Grounds: Increase your coffee-to-water ratio. For a stovetop cappuccino recipe, you want a much stronger brew than your regular cup of coffee. Try using an extra spoonful of grounds in your French press or Moka pot.
- Check Your Grind: A grind that is too coarse will result in a watery coffee. Ensure your grind is fine enough to extract a concentrated flavor. A grind similar to coarse sand is a good starting point for most non-espresso methods.
- Try a Different Method: If your drip machine isn’t producing a strong enough brew, consider investing in a low-cost AeroPress or Moka pot. These tools are designed specifically to create a concentrated coffee base that works perfectly for a salted caramel coffee.
Creating Satisfactory Milk Foam
Thin, watery foam is a common frustration, but it’s easy to fix once you understand the science of frothing.
- The Right Milk Matters: Whole milk, with its higher fat content, creates a thicker, more stable foam. While other milks can be frothed, you might get a less creamy result. If using non-dairy milk, choose a barista blend specifically designed for frothing.
- Heat is Key: Make sure your milk is hot enough (around 140-160°F or 60-70°C) before you start frothing. If the milk is too cold, the fat won’t break down properly to create a stable foam.
- Vary Your Technique: Don’t be afraid to experiment. With a French press, try pumping slower or faster. With a mason jar, shake for a longer period. The goal is to introduce as much air as possible into the milk without creating giant, unstable bubbles.
Perfecting Your Salted Caramel
Making caramel can be intimidating, but a few simple tweaks can solve most issues.
- It’s Grainy! This happens when the sugar recrystallizes. To avoid this, don’t stir the sugar and water mixture once it begins to boil. Swirl the pan occasionally instead.
- It Tastes Burnt! Burnt caramel has a bitter taste. The key is to remove the pan from the heat immediately when it reaches a deep amber color. It will continue to cook a bit off the heat, so act fast.
- Adjusting the Salt: Taste as you go! Add the salt in small increments until you find the perfect balance for your personal preference.
By keeping these tips in mind, you can troubleshoot any issues that arise and gain the confidence to perfect your homemade salted caramel syrup and cappuccino.
Elevating Your Home Coffee Experience-
You’ve successfully mastered the homemade cappuccino without a machine, and you’ve even created your own delicious salted caramel syrup. But the journey doesn’t have to end here. A DIY coffee drinks approach is all about experimentation and making your coffee truly your own.
- Experiment with Coffee Beans: The type of coffee you use can dramatically change the flavor profile of your drink. Try using different roasts—a light roast will give you brighter, more acidic notes that contrast with the caramel, while a dark roast will create a bolder, more roasty flavor that complements it. Explore beans from different regions to find your favorite blend.
- Explore New Flavor Combinations: Your homemade salted caramel syrup is a fantastic base, but don’t be afraid to try other flavors. Consider adding a dash of vanilla extract to the syrup, a pinch of cinnamon to your coffee grounds, or even a hint of nutmeg on top of the foam. The possibilities are endless when you have a homemade coffee bar.
- Master the Presentation: Presentation is a huge part of the cafe experience. Invest in a nice set of mugs, or get a clear glass cup to show off your beautiful layers. A simple caramel drizzle and a pinch of flaky sea salt on top can make your drink look as professional as it tastes. The effort you put into the presentation can make your daily coffee ritual feel like a truly luxurious treat.
The joy of making a barista-style cappuccino is not just about the final product, but the entire process of learning, creating, and customizing a drink that is perfectly tailored to your taste. This is the essence of why people are searching for ways to make gourmet coffee at home.
Journey to Homemade Salted Caramel Cappuccino Success
You’ve embarked on a rewarding journey, proving that cafe-quality coffee is not reserved for those with expensive, elaborate equipment. You’ve learned how to create a rich, strong coffee base using simple tools like a French press or Moka pot. You’ve unlocked the secret to frothing milk at home for a thick and creamy foam, and you’ve mastered the art of making your own perfectly balanced homemade salted caramel syrup.