The Ultimate Guide to Perfect Espresso
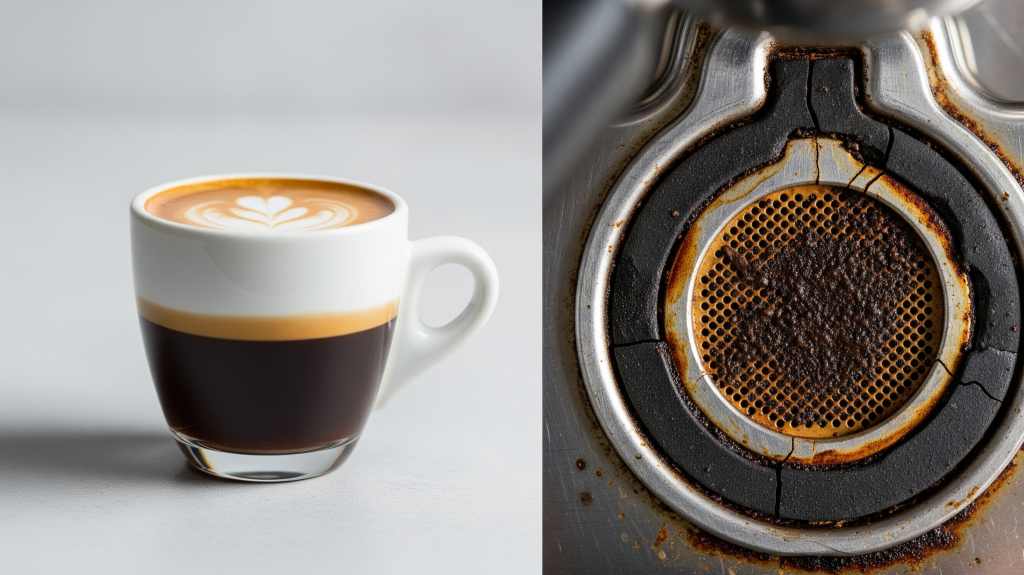
Do you remember that incredible aroma, that rich crema, that perfectly balanced flavor from your very first espresso shot? The one that made you fall in love with the art of home barista-ing? But lately, has your beloved espresso machine been acting a little…off? Perhaps a watery shot, coffee grounds in your cup, or even a persistent leak? If so, you’re not alone, and the good news is, the solution might be simpler (and cheaper!) than you think. Often, the culprits behind these espresso woes are two unsung heroes of your machine: the espresso machine gaskets (specifically the group head gasket) and the shower screen.
These seemingly minor components play a monumental role in the quality of your espresso. Think about it: the gasket creates the high-pressure seal essential for extraction, and the shower screen ensures even water distribution. When they fail, your espresso suffers. But how do you know when to replace espresso machine parts like these? What are the signs of a worn out gasket or a clogged shower screen? And how often should you actually be performing this crucial espresso machine maintenance?
This comprehensive guide will demystify the process, helping you understand the vital role these parts play, recognize the telltale signs of wear, and confidently replace them, ensuring you continue to pull that perfect shot every single time. We’ll cover everything from espresso machine leaking from portafilter to how often to replace group head gasket, so let’s dive in and reclaim your perfect espresso!
The Unsung Heroes: Understanding Gaskets and Shower Screens
Before we delve into replacement, let’s appreciate what these components do.
The Group Head Gasket: The Sealing Champion
The group head gasket, also known as the portafilter gasket or brew group gasket, is a rubber or silicone ring that sits within the group head of your espresso machine. Its primary function is to create a tight, high-pressure seal between the portafilter and the group head during extraction. When you lock your portafilter into place, the gasket compresses, preventing water from escaping and forcing it through the coffee puck at the precise pressure needed for optimal extraction.
- Types of Gaskets: Gaskets are typically made from rubber (EPDM) or silicone.
- Rubber gaskets are traditional, durable, and generally cheaper. However, they can harden and crack over time, especially with heat exposure.
- Silicone gaskets are more flexible, last longer, and are easier to install and remove. They are also less prone to hardening. While they might cost a bit more upfront, their longevity often makes them a more economical choice in the long run.
The Shower Screen: The Even Distribution Maestro
The shower screen (sometimes called the dispersion screen) is a metal disc located just above where the coffee puck sits in the group head. Its surface is perforated with numerous small holes. Its crucial role is to evenly disperse the pressurized hot water over the entire surface of the coffee puck. This even distribution is paramount for consistent and balanced extraction. Without it, water would channel through specific paths in the coffee, leading to underextraction in some areas and overextraction in others, resulting in a sour or bitter, unbalanced shot.
- Function: Ensures water flows uniformly over the coffee grounds.
- Impact on Espresso: Directly affects extraction consistency and flavor profile. A clean, properly functioning shower screen is essential for getting the most out of your coffee.
Signs You Need to Replace Your Gaskets
Your espresso machine is usually quite vocal when its gasket is failing. Pay attention to these common symptoms:
1. Leaking Around the Portafilter
This is perhaps the most obvious and common sign. If you notice water leaking from the portafilter when brewing, especially around the edges where it meets the group head, your gasket is almost certainly compromised. The seal is no longer tight enough to withstand the brewing pressure.
- What it looks like: Drops or streams of water escaping from around the portafilter basket during extraction.
- Why it happens: The gasket has hardened, cracked, or shrunk, preventing a proper seal.
2. Difficulty Locking in the Portafilter
If you find yourself having to apply excessive force to lock your portafilter into the group head, or if it feels unusually loose or wobbly even when locked, it’s a strong indicator that your gasket is either too hard (and old) or has lost its elasticity.
- Old Gasket: A hardened gasket won’t compress properly, making it difficult to achieve a secure lock.
- New Gasket: Ironically, sometimes a new, slightly thicker gasket can also initially make it harder to lock, but this usually eases after a few uses as it settles. However, persistent difficulty points to an issue.
3. Reduced Crema or Weak Shots
While many factors influence crema, a failing gasket can contribute. If the pressure seal is compromised, some of the brewing pressure is lost, leading to less efficient extraction. This can manifest as:
- Thin, wispy crema: Not the rich, tiger-striped crema you’re used to.
- Under-extracted shots: Shots that taste sour, watery, or lack body.
4. Visible Cracks or Hardening of the Gasket
Take a peek at your gasket. Carefully remove the shower screen (we’ll cover that later) and inspect the gasket ring.
- Visual Inspection: Look for cracks in espresso machine gasket, tears, or signs of brittleness.
- Texture Test: Gently try to press your fingernail into the gasket. If it feels hard and rigid rather than pliable and rubbery, it’s past its prime. This hardening is a natural process due to repeated exposure to heat and pressure.
5. Coffee Grounds in Your Espresso
This is less common for gasket issues and more for shower screen problems, but a severely degraded gasket that’s no longer holding the shower screen tightly could potentially allow some grounds to bypass. However, for grounds in your cup, the shower screen is usually the primary suspect.
When to Replace: How Often is “Often Enough”?
The lifespan of your group head gasket depends on several factors:
- Usage Frequency: A machine used daily will need more frequent replacements than one used weekly.
- Gasket Material: As mentioned, silicone gaskets generally outlast rubber ones.
- Brewing Temperature: Higher brewing temperatures can accelerate gasket degradation.
- Cleaning Routine: Regular backflushing and cleaning help prevent coffee oils from building up and hardening the gasket.
General Guidelines for Gasket Replacement:
- Rubber Gaskets: Aim to replace every 6 to 12 months for moderate to heavy home use. Commercial machines might need replacement every 3-6 months.
- Silicone Gaskets: These can often last 1 to 2 years or even longer, depending on use.
Pro Tip: Even if you don’t notice overt signs of failure, consider replacing your gasket preventatively within these timeframes. It’s a small cost for peace of mind and consistent espresso quality. Many seasoned baristas replace their gaskets as part of their annual or bi-annual maintenance routine, much like changing the oil in a car.
Signs You Need to Clean or Replace Your Shower Screen
The shower screen is constantly exposed to hot water and coffee oils, making it prone to clogging.
1. Uneven Water Flow
This is the most critical indicator. When you run your machine without the portafilter attached, observe the water flow from the group head.
- Healthy Flow: Water should emerge as a uniform, even shower, with droplets falling consistently from all holes in the screen.
- Problematic Flow: If you see water spurting out in jets, dripping unevenly, or only coming from certain areas, your shower screen is likely clogged.
- How to check: Remove the portafilter and run the brew cycle.
2. Reduced Extraction Pressure (or Slow Flow)
A severely clogged shower screen restricts water flow to the coffee puck, leading to:
- Slower extraction time: Your shots might take longer to pull, even with the correct grind and dose.
- Weak, under-extracted shots: Similar to gasket issues, uneven water distribution leads to poor extraction and a thin, watery espresso.
3. Coffee Grounds in Your Espresso Cup
If you consistently find coffee grounds in your espresso, even with a fine grind, it’s a strong sign that your shower screen is either damaged (holes are too large or compromised) or so clogged that it’s forcing grounds through.
- Beyond Cleaning: If cleaning doesn’t resolve this, the screen itself might be damaged and require replacement.
4. Rancid or Off Flavors in Espresso
Over time, coffee oils and residue can build up on the shower screen. These oils can turn rancid, imparting unpleasant, bitter, or sour flavors to your espresso, even with fresh beans.
- Taste Test: If your espresso tastes “off” despite using fresh beans and a clean machine, a dirty shower screen is a likely culprit.
5. Visible Clogging or Debris
Simply looking at the underside of your shower screen can reveal a lot.
- Inspection: Look for visible coffee grounds, oils, or mineral deposits blocking the holes. The screen might appear dark, greasy, or have white mineral scale.
When to Replace: How Often is “Often Enough”?
Unlike gaskets, shower screens often benefit more from frequent cleaning than outright replacement, especially if they are well-maintained.
General Guidelines for Shower Screen Maintenance:
- Daily Wipe Down: After each use, give the shower screen a quick wipe with a damp cloth to remove loose grounds.
- Weekly Backflush with Detergent: For machines with a 3-way solenoid valve (most E61 groups and many home machines), backflushing with a specialized espresso machine detergent (like Cafiza or Puro Caff) is crucial. This helps dissolve built-up coffee oils. Aim for at least once a week for moderate use, or every few days for heavy use.
- Deep Clean/Soak: Every 1-3 months, remove the shower screen and soak it in a solution of espresso machine detergent. Use a brush to scrub away stubborn residue.
- Replacement: A shower screen typically only needs replacement when:
- It’s visibly damaged (bent, torn, or holes are enlarged).
- It’s so severely clogged that even deep cleaning doesn’t restore even water flow.
- You’ve tried all cleaning methods, and you still get uneven extraction or grounds in your cup.
- Upgrading: Some enthusiasts opt for “precision” shower screens (like IMS or E&B Lab) that offer finer holes and theoretically better water dispersion. This isn’t a replacement due to wear, but an upgrade for performance.
Pro Tip: Always have a spare shower screen on hand. They are relatively inexpensive and can save your brewing session if your current one unexpectedly fails or becomes irrevocably clogged.
The Replacement Process: A Step-by-Step Guide
Replacing gaskets and shower screens is a relatively simple DIY task that most home baristas can accomplish with basic tools.
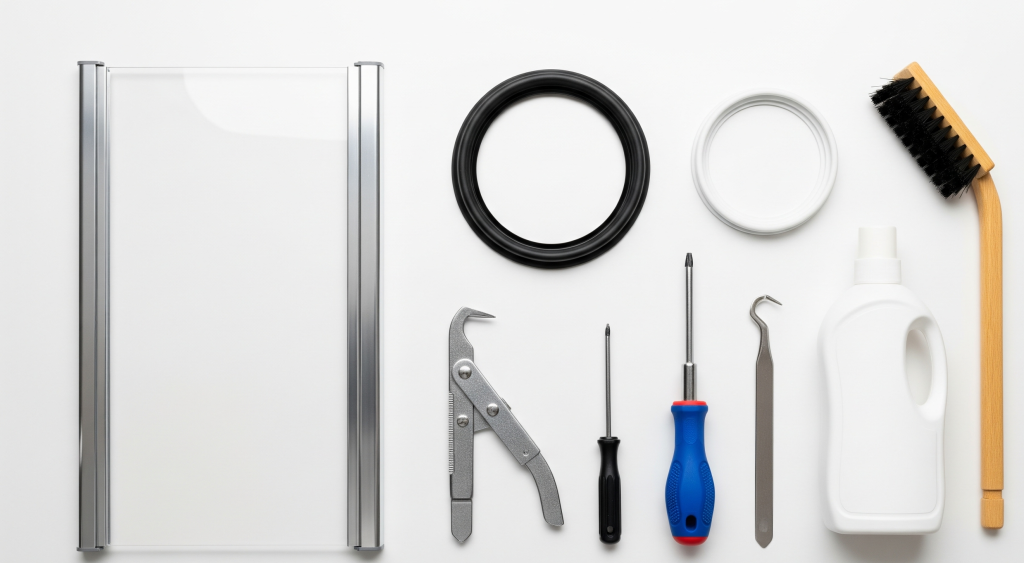
What You’ll Need:
- New Group Head Gasket: Ensure it’s the correct size and type for your specific espresso machine model. Check your machine’s manual or an online parts retailer.
- New Shower Screen (if replacing): Again, ensure compatibility.
- Flathead Screwdriver or Gasket Pick Tool: A specialized pick tool makes removal easier.
- Brush (for cleaning the group head): A stiff bristle brush or a dedicated group head brush.
- Clean Cloths/Paper Towels: For wiping away grime.
- Espresso Machine Detergent (e.g., Cafiza, Puro Caff): For thorough cleaning.
- Optional: Food-grade silicone lubricant (for easier gasket installation).
Step-by-Step Gasket & Shower Screen Replacement:
Important Safety Note: Always ensure your espresso machine is turned off and unplugged before you begin. Allow it to cool down completely to avoid burns from hot water or steam.
- Remove the Portafilter: Make sure your portafilter is out of the group head.
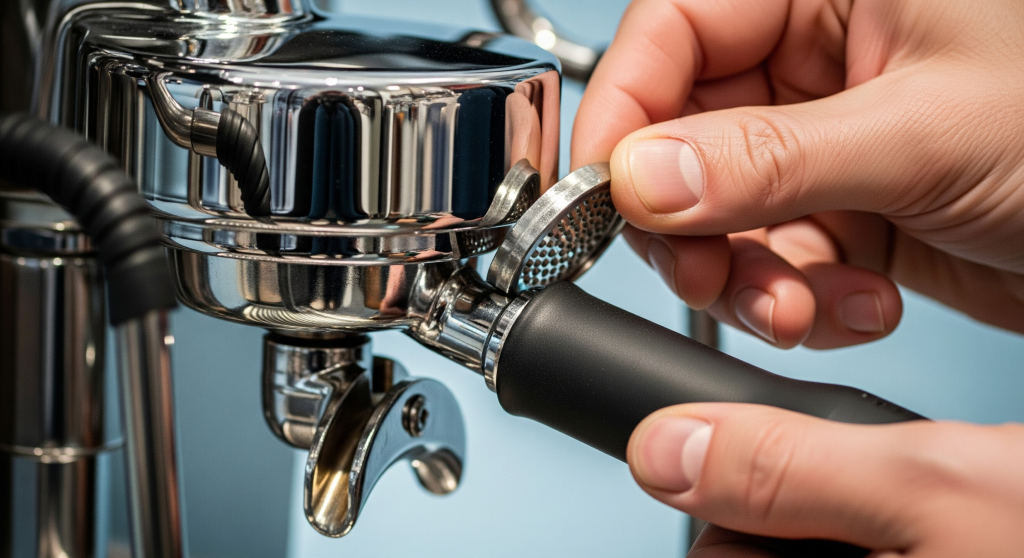
- Remove the Shower Screen (and Diffuser if applicable):
- Most shower screens are held in place by a single screw in the center. Use your screwdriver to unscrew it.
- Carefully pull down the shower screen. Some machines also have a separate dispersion block or diffuser that sits behind the shower screen – if so, remove this as well, noting its orientation.
- Inspect and Clean the Group Head:
- With the shower screen and diffuser off, you’ll have a clear view of the group head interior and the old gasket.
- Use your brush to thoroughly scrub away any loose coffee grounds, oils, and grime from the entire group head, especially the area where the gasket sits.
- You can also backflush your machine with a blind basket and detergent at this stage to flush out any internal grime, but be careful not to splash.
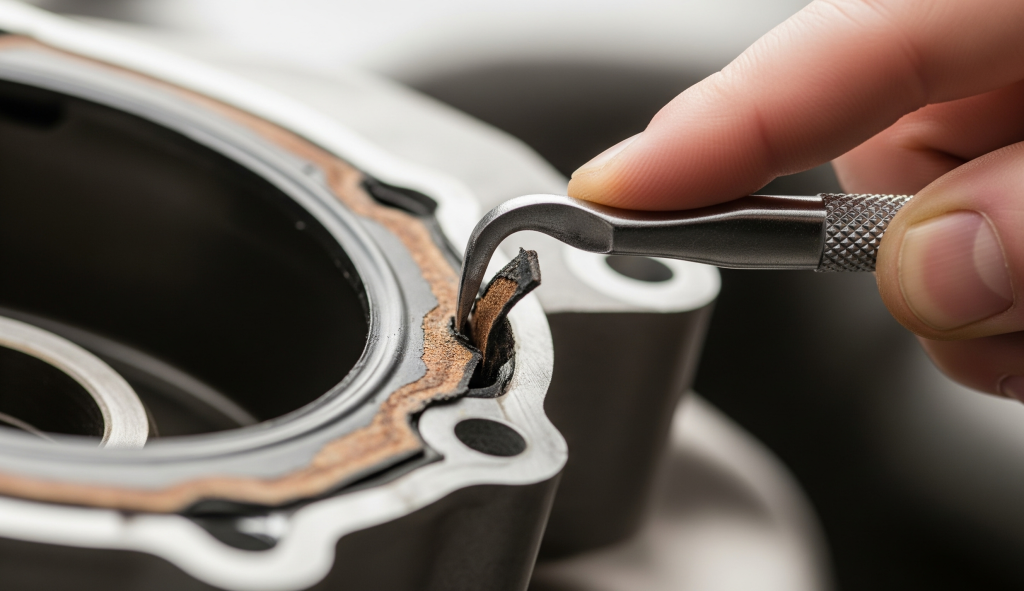
- Remove the Old Gasket:
- This can be the trickiest part, especially if the gasket is hardened and stuck.
- Use your gasket pick tool or a flathead screwdriver. Carefully insert the tip between the gasket and the metal of the group head.
- Gently pry the gasket downwards, working your way around the circumference. Be patient and avoid scratching the metal of the group head.
- Once you get a section out, the rest should follow more easily.
- Clean the Gasket Groove:
- Once the old gasket is out, thoroughly clean the groove where it sits. This area accumulates a lot of old coffee residue.
- Use your brush and a damp cloth. For stubborn residue, a little espresso machine detergent on a cloth can help. Ensure it’s completely clean and dry before installing the new gasket.
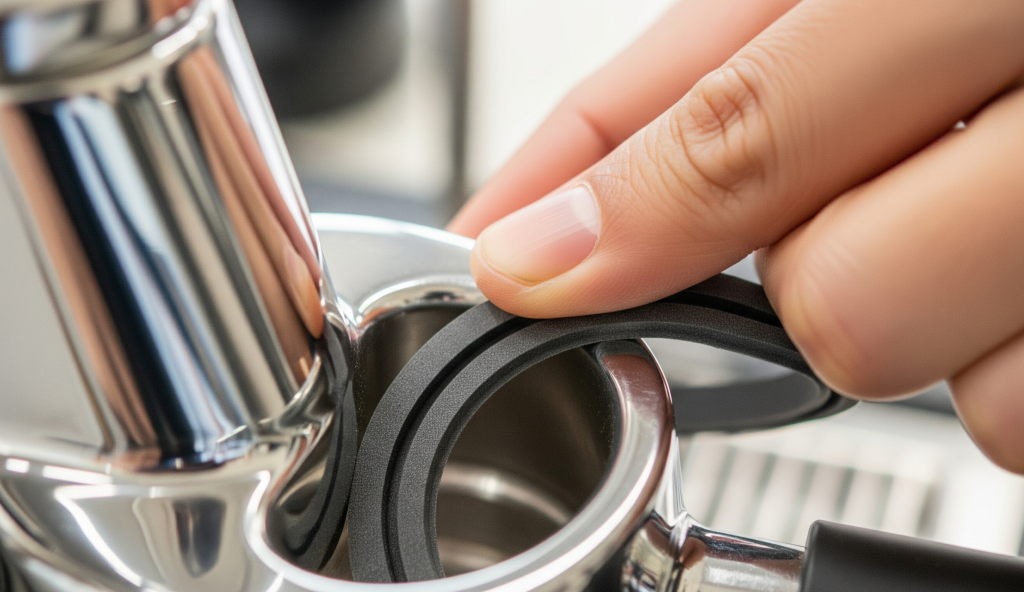
- Install the New Gasket:
- If using a rubber gasket, you might want to soak it in warm water for a few minutes to make it more pliable.
- For easier installation, you can apply a tiny amount of food-grade silicone lubricant to the outer edge of the new gasket (this is optional but recommended).
- Orient the gasket correctly (some have a chamfered edge – the tapered side usually faces inwards towards the brew path).
- Carefully push the new gasket into the groove in the group head. Work your way around, ensuring it’s seated evenly and securely. You might need to use your thumbs to press it firmly into place. It should sit flush and snug.
- Install the New (or Cleaned) Shower Screen and Diffuser:
- If you’re replacing the shower screen, use the new one. If you’re reusing your old one, ensure it’s sparkling clean (soak it in detergent and scrub thoroughly).
- Reinsert the diffuser (if applicable) in its correct orientation.
- Place the shower screen over the screw hole and reinsert the screw. Don’t overtighten it – just snug.
- Test Your Machine:
- Plug in and turn on your espresso machine. Allow it to heat up fully.
- Run a few blank shots (without coffee in the portafilter) to check for leaks and ensure everything is working correctly.
- Perform a backflush if your machine allows, and then pull a test shot of espresso. Enjoy the perfectly sealed, perfectly extracted results!
Preventative Maintenance for Longevity
Regular maintenance goes a long way in extending the life of your gaskets and shower screens, and ultimately, your espresso machine.
- Daily Wipe Down: After each session, wipe down the group head and shower screen to remove loose coffee grounds.
- Regular Backflushing: For machines with a 3-way solenoid, backflush with water daily and with espresso machine detergent weekly (or as recommended by your machine’s manufacturer). This prevents coffee oils from building up on the shower screen and inside the group head, which can harden gaskets and clog screens.
- Use Filtered Water: This minimizes mineral scale buildup (limescale) on all internal components, including the shower screen and the group head itself. Descale your machine regularly according to the manufacturer’s instructions.
- Don’t Overtighten the Portafilter: Forcing the portafilter too hard into the group head can prematurely wear out the gasket. Lock it in firmly until it’s snug, but avoid excessive force.
- Allow Machine to Cool: If you’re not using your machine for an extended period, turn it off. Constant high heat can degrade rubber gaskets faster.
The Takeaway: Small Parts, Big Impact
It’s easy to overlook the small, unassuming parts of your espresso machine, but as we’ve seen, the group head gasket and shower screen are absolutely critical for producing consistently high-quality espresso. Ignoring them can lead to frustrating leaks, uneven extraction, and off-tasting shots.
By understanding the signs of wear – from espresso machine leaking from portafilter to uneven water flow and coffee grounds in your cup – and by adhering to a simple schedule of preventative maintenance and timely replacement, you’ll ensure your machine continues to perform at its best.