
Why the AeroPress is Your Morning Game-Changer
Imagine waking up to the rich aroma of café-quality AeroPress coffee, brewed in just a few minutes, right in your kitchen. Did you know that the AeroPress, invented in 2005 by Alan Adler, has become a global favorite for home baristas, with over 1 million units sold by 2025? This compact, versatile device delivers a smooth coffee that rivals espresso machines costing hundreds more. In this AeroPress brewing guide, we’ll walk you through the ultimate AeroPress recipe for a smooth morning coffee recipe, tailored for AeroPress coffee for beginners and seasoned home baristas alike. You’ll learn the exact steps, equipment, and AeroPress tips to craft a perfect cup, plus hacks to elevate your home coffee brewing game. Whether you’re new to the AeroPress or looking to refine your coffee brewing techniques, this article has everything you need to start your day with a delicious, sustainable coffee brewing brew.
What Makes the AeroPress Special?
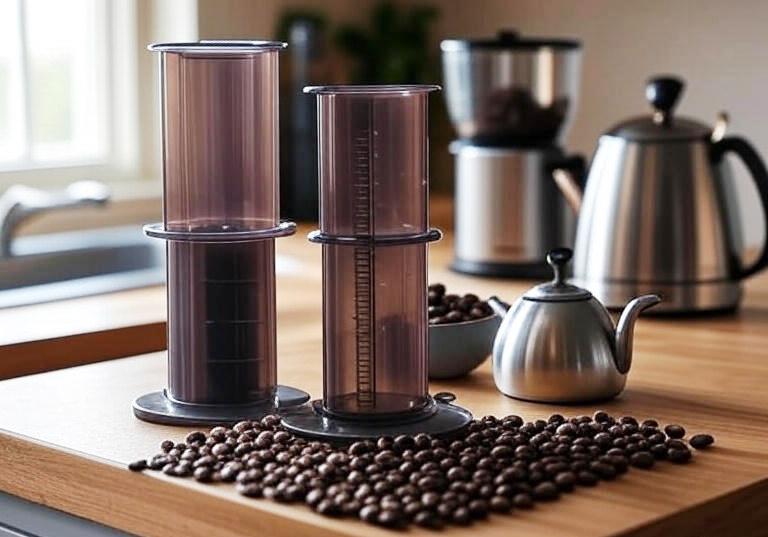
The AeroPress stands out in the crowded world of coffee makers for its simplicity, portability, and ability to produce a clean, flavorful AeroPress coffee. Unlike a French press, which can leave sediment, or a drip machine, which lacks precision, the AeroPress uses air pressure to extract coffee quickly and evenly. Its versatility allows for endless experimentation, from espresso-style shots to cold brew concentrates. According to a 2025 survey by the Specialty Coffee Association, 68% of home baristas prefer the AeroPress for its ease of use and consistent results.
Key Benefits of the AeroPress
- Speed: Brews AeroPress coffee in under 2 minutes.
- Portability: Perfect for home coffee brewing, travel, or camping.
- Versatility: Supports multiple coffee brewing techniques (standard, AeroPress inverted method, cold brew).
- Affordability: Costs ~$40, making it accessible for AeroPress coffee for beginners.
- Sustainability: Uses reusable filters and minimal water compared to drip machines, ideal for sustainable coffee brewing.
Equipment You’ll Need for the Ultimate AeroPress Recipe
Before diving into the AeroPress recipe, let’s gather the essentials. You don’t need a fancy setup to make great AeroPress coffee, but the right tools make a difference.
Must-Have Tools
- AeroPress: Original or AeroPress Go for portability.
- Coffee Grinder: Burr grinder (e.g., Baratza Encore, ~$150) for consistent AeroPress grind size.
- Coffee Beans: Fresh, medium-roast best coffee beans for AeroPress.
- Kettle: Gooseneck kettle (e.g., Fellow Stagg EKG, ~$85) for precise AeroPress water temperature.
- Scale: Digital scale (e.g., Timemore Black Mirror, ~$30) for accurate measurements.
- Timer: Your phone or a kitchen timer.
- Filter: Paper or reusable metal filter (e.g., Able Disk, ~$15).
- Mug: A sturdy 10–12 oz mug to collect your smooth coffee.
Choosing the Right Best Coffee Beans for AeroPress
The quality of your coffee beans is the foundation of a smooth coffee. For the AeroPress, medium-roast, single-origin beans are ideal because they balance flavor and acidity without overwhelming bitterness.
Bean Recommendations
- Ethiopian Yirgacheffe: Bright, floral notes with hints of citrus (great for pour-over-style AeroPress coffee).
- Colombian Supremo: Nutty, chocolatey flavors for a balanced AeroPress recipe.
- Sumatra Mandheling: Earthy, low-acidity beans for a bold AeroPress coffee brew.
Tips for Choosing Beans
- Freshness: Buy best coffee beans for AeroPress roasted within the last 2–4 weeks. Check the roast date on the bag.
- AeroPress Grind Size: Medium-fine (like table salt) for optimal coffee extraction. Grind just before brewing to preserve flavor.
- Sustainability: Opt for fair-trade or organic beans to support sustainable coffee brewing. In 2025, brands like Blue Bottle and Counter Culture lead in sustainable sourcing.
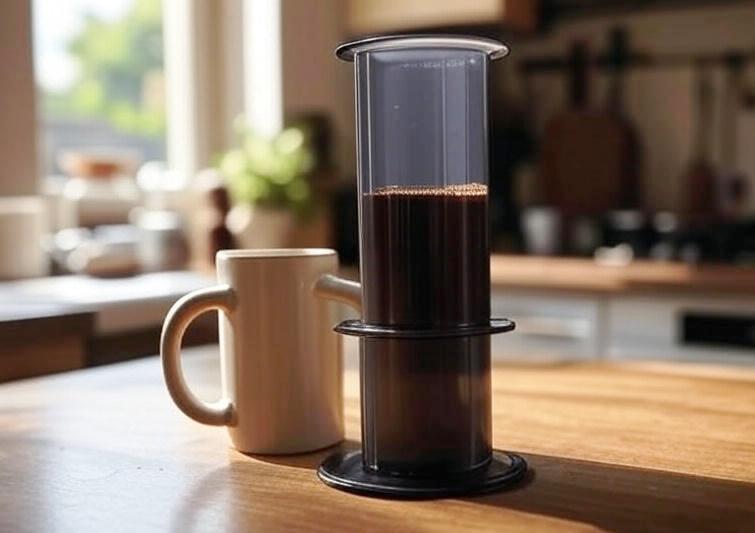
The Ultimate AeroPress Recipe: Step-by-Step
This AeroPress recipe is designed for a smooth morning coffee recipe that’s perfect for your home barista routine. It uses the standard method for simplicity but includes notes for the AeroPress inverted method if you prefer more control. The recipe yields one 8–10 oz cup.
Ingredients
- 17g freshly ground coffee (medium-fine AeroPress grind size)
- 250g filtered water (AeroPress water temperature: 195–205°F or 90–96°C)
- AeroPress paper filter (or reusable metal filter)
- Optional: 1 tsp honey or plant-based milk for flavor
Equipment Setup
- AeroPress (assembled with plunger and filter cap)
- Gooseneck kettle
- Digital scale
- Timer
- Stirring spoon or paddle
- Mug
Step-by-Step Instructions
- Boil Water
Heat 250g of filtered water to AeroPress water temperature of 195–205°F (90–96°C). A gooseneck kettle ensures precise pouring. If you don’t have a thermometer, let boiling water sit for 30 seconds to cool slightly.
- Grind Coffee
Measure 17g of best coffee beans for AeroPress and grind them to a medium-fine AeroPress grind size (similar to table salt). A burr grinder ensures uniformity, which prevents over- or under-coffee extraction.
- Prepare the AeroPress
Place a paper filter in the AeroPress cap and rinse it with hot water to remove paper taste and preheat the chamber. Attach the cap to the AeroPress and set it on your mug.
- Add Coffee
- Pour the 17g of ground coffee into the AeroPress chamber. Tap gently to level the grounds for even coffee extraction.
- Bloom the Coffee
Start your timer and pour 40g of hot water over the grounds in a slow, circular motion. Stir gently for 5 seconds to ensure all grounds are wet. Let it bloom for 30 seconds. This step releases trapped gases, enhancing flavor.
- Pour Remaining Water
After the bloom, pour the remaining 210g of water (to reach 250g total) in a steady, circular motion over 10–15 seconds. Stir gently for 5 seconds to mix.
- Press the Coffee
At the 1:30 mark on your timer, insert the plunger and press down slowly (15–20 seconds) until you hear a hissing sound. Stop pressing when resistance increases.
- Serve and Enjoy
Your AeroPress coffee is ready! Swirl the mug to mix the brew. Add honey, milk, or enjoy it black for a smooth coffee taste.
AeroPress Inverted Method Variation
For more control over coffee extraction, try the AeroPress inverted method:
- Flip the AeroPress so the plunger is at the bottom.
- Add coffee and water as above, but stir longer (10 seconds) to agitate grounds.
- At 1:30, flip the AeroPress onto your mug, attach the filter cap, and press.
Optimizing Your AeroPress Coffee: Key Variables
To achieve a consistently smooth morning coffee recipe, you’ll need to fine-tune these variables. Each adjustment can dramatically change the flavor profile.
- AeroPress Grind Size
- Medium-Fine: Ideal for balanced coffee extraction (1–2 minute brew time).
- Too Coarse: Leads to weak, under-extracted AeroPress coffee.
- Too Fine: Causes over-coffee extraction, resulting in bitterness.
- Tip: If your AeroPress coffee tastes sour, grind finer. If it’s bitter, grind coarser.
- AeroPress Water Temperature
- 195–205°F (90–96°C): Perfect for extracting flavors without burning the coffee.
- Too Hot (>205°F): Burns the grounds, creating a harsh taste.
- Too Cool (<195°F): Under-extracts, making AeroPress coffee taste flat.
- Coffee-to-Water Ratio
- Standard Ratio: 1:15 (17g coffee to 250g water) for a balanced AeroPress recipe.
- Stronger Brew: Use a 1:10 ratio (17g coffee to 170g water) for espresso-style AeroPress coffee.
- Weaker Brew: Use a 1:17 ratio (17g coffee to 289g water) for a lighter smooth coffee.
- Brew Time
- 1:30–2:00 Total: Including bloom and press time.
- Longer Brew: Increases strength but risks bitterness.
- Shorter Brew: Produces a lighter, less extracted AeroPress coffee.
- Pressing Technique
- Slow, steady pressure (15–20 seconds) ensures even coffee extraction.
- Pressing too fast can cause channeling, where water bypasses some grounds, leading to uneven flavor.
Chart: A table comparing AeroPress grind size, AeroPress water temperature, and brew time effects on AeroPress coffee flavor: –
| Variable | Setting | Flavor Impact |
| AeroPress Grind Size | Medium-Fine | Balanced, smooth coffee |
| Coarse | Weak, under-extracted | |
| Fine | Bitter, over-extracted | |
| AeroPress Water Temperature | 195–205°F | Optimal flavor |
| >205°F | Harsh, burnt | |
| <195°F | Flat, under-extracted | |
| Brew Time | 1:30–2:00 | Balanced |
| <1:30 | Weak, thin | |
| >2:00 | Bitter, strong |
Troubleshooting Common AeroPress Mistakes
Even with the best AeroPress recipe 2025, things can go wrong. Here’s how to fix common issues for a smooth coffee.
- AeroPress Coffee Tastes Bitter
- Cause: Over-coffee extraction from fine AeroPress grind size, high AeroPress water temperature, or long brew time.
- Fix: Use a coarser AeroPress grind size, lower AeroPress water temperature to 195°F, or shorten brew time to 1:30.
- AeroPress Coffee Tastes Sour or Weak
- Cause: Under-coffee extraction from coarse AeroPress grind size, low AeroPress water temperature, or short brew time.
- Fix: Grind finer, increase AeroPress water temperature to 205°F, or extend bloom to 45 seconds.
- Brew Feels Gritty
- Cause: Using a paper filter with a coarse AeroPress grind size or a worn-out reusable filter.
- Fix: Switch to a fresh paper filter or grind finer with a metal filter.
- Pressing Is Too Hard
- Cause: AeroPress grind size is too fine, or too much coffee is used.
- Fix: Use a slightly coarser AeroPress grind size or reduce coffee to 15g.
Advanced AeroPress Tips for a Barista Coffee at Home
Once you’ve mastered the basic AeroPress recipe, try these hacks to elevate your smooth morning coffee recipe.
- Experiment with the AeroPress Inverted Method
- The AeroPress inverted method prevents water from dripping through before pressing, giving you more control over coffee extraction. Stir for 10 seconds during the bloom for a bolder flavor.
- Use a Metal Filter
- A reusable metal filter (e.g., Able Disk) allows more coffee oils to pass through, creating a richer, espresso-like texture. Clean it thoroughly to avoid residue buildup.
- Try Cold Brew with AeroPress
- Use 20g coarse-ground best coffee beans for AeroPress and 200g cold water.
- Stir and let sit for 2 minutes before pressing.
- Dilute with ice or milk for a refreshing summer AeroPress coffee.
- Adjust for Non-Dairy Milk
- For plant-based lattes, use oat or almond milk. Heat to 140°F (60°C) to avoid curdling, and froth with a handheld frother for creamy texture.
- Dial in Your AeroPress Grind Size with a Scale
- Weigh your coffee to the nearest 0.1g for precision. A consistent 17g dose ensures repeatable results for barista coffee at home.

Pairing Your AeroPress Coffee with Breakfast
A smooth coffee from your AeroPress pairs beautifully with breakfast. Here are some ideas to complement your coffee’s flavor profile:
- Ethiopian Yirgacheffe: Pair with citrusy pastries or yogurt parfaits to enhance floral notes.
- Colombian Supremo: Matches well with chocolate croissants or oatmeal for a nutty balance.
- Sumatra Mandheling: Complements savory dishes like avocado toast or eggs benedict.
Sustainable Coffee Brewing with the AeroPress
In 2025, sustainable coffee brewing is a top priority for coffee lovers. The AeroPress is inherently eco-friendly, but you can take it further:
- Reusable Filters: Switch to a metal filter to reduce waste.
- Compost Coffee Grounds: Use spent grounds as fertilizer for plants.
- Minimal Water Use: The AeroPress uses less water (250g per cup) than drip machines (500g+).
- Ethical Beans: Choose fair-trade or Rainforest Alliance-certified best coffee beans for AeroPress to support sustainable coffee brewing.
Why This AeroPress Recipe Works
This AeroPress recipe delivers a smooth coffee because it balances coffee extraction variables:
- Bloom Phase: Releases gases for better flavor clarity.
- Medium-Fine AeroPress Grind Size: Ensures even coffee extraction without bitterness.
- Controlled AeroPress Water Temperature: Preserves delicate flavors.
- Quick Brew Time: Prevents over-coffee extraction for a clean taste.
