Your Journey to Delicious, Personalized Drinks Starts Here
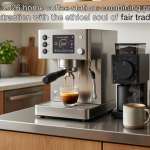
Do you ever find yourself craving that perfectly crafted vanilla latte or a rich caramel macchiato, but the thought of a trip to the coffee shop feels like too much of a hassle? What if I told you that the secret to a professional-quality, café-style drink is already within your reach? It’s not about a fancy machine or expensive beans; it’s about the syrup. And the best part? You can make it yourself.
Homemade flavored syrups are a game changer. They allow you to control the ingredients, avoid artificial additives, and customize the flavor to your exact preference. Whether you’re a coffee connoisseur, a mixologist, or a home baker, a high-quality vanilla syrup or caramel syrup is an essential pantry staple. Forget the store-bought bottles filled with preservatives and high-fructose corn syrup. We’re going to dive deep into how to make homemade vanilla syrup and how to make homemade caramel syrup, transforming simple ingredients into liquid gold.
This article will guide you through the entire process, from understanding the basics of simple syrup to mastering the more complex art of caramelization. We’ll provide detailed, easy-to-follow recipes, share expert tips for getting the texture and taste just right, and give you creative ideas for how to use your new creations. By the end, you’ll have the knowledge and confidence to make your own syrup and elevate every drink and dessert you create.
Part 1: The Foundation of Flavor Simple Syrup 101
Before we tackle the complexities of vanilla and caramel, we must understand the fundamental building block of most flavored syrups: simple syrup. The name says it all it’s incredibly simple, yet it’s the key to everything that follows.
What is Simple Syrup?
At its core, simple syrup is a liquid sweetener made from a combination of sugar and water. Unlike granulated sugar, which doesn’t dissolve well in cold liquids, simple syrup blends seamlessly into iced coffee, cocktails, and cold brews, providing a smooth, consistent sweetness without a grainy texture.
The basic simple syrup ratio is 1:1, meaning one part sugar to one part water by volume. This creates a standard syrup that is easy to pour and mix. However, there are other ratios you can explore. A “rich” simple syrup uses a 2:1 ratio of sugar to water, resulting in a thicker, more concentrated syrup that lasts longer in the refrigerator. We will mostly be working with the 1:1 ratio for our flavored syrups, but it’s good to know your options.
The Process: From Sugar to Syrup
Making simple syrup is straightforward. You simply heat water and sugar together in a saucepan until the sugar completely dissolves. There’s no need to boil it for a long time; the goal is just to dissolve the sugar. Once the sugar has fully integrated into the water, you have your base.
The beauty of homemade syrup is that this simple base can be infused with an endless variety of flavors, from fresh herbs and spices to fruits and extracts. For our purposes, this plain simple syrup will be the starting point for our vanilla syrup.
Part 2: How to Make Classic Homemade Vanilla Syrup
Vanilla syrup is a must-have for any home beverage station. Its sweet, floral, and rich flavor is a perfect partner to coffee, tea, and countless other drinks. The best part about DIY vanilla syrup is that you can achieve a depth of flavor that store-bought versions simply can’t match.
The Ingredients: Quality is Key
To make truly exceptional vanilla syrup, the quality of your vanilla flavoring matters. You have three main options, each with a different cost and flavor profile.
- Vanilla Extract: This is the most common and accessible option. Use a pure vanilla extract for the best results, as imitation vanilla will give your syrup an artificial taste.
- Vanilla Bean Paste: This offers a more intense flavor and adds beautiful vanilla bean specks to your syrup, giving it a professional, artisan look. It’s a fantastic middle ground between extract and whole beans.
- Whole Vanilla Beans: For the most luxurious and complex flavor, a whole vanilla bean is the way to go. The flavor is richer, deeper, and more nuanced than with extracts or paste. While more expensive, a single vanilla bean can be reused a few times to make multiple batches of syrup.
Step-by-Step Vanilla Syrup Recipe
This recipe is simple to follow and yields a delicious, aromatic syrup.
Yields: Approximately 1 ½ cups Prep Time: 5 minutes Cook Time: 5-10 minutes Total Time: 20 minutes (including cooling)
Ingredients:
- 1 cup granulated white sugar
- 1 cup water
- Flavoring Option (Choose one):
- 1 tablespoon pure vanilla extract
- 1 tablespoon vanilla bean paste
- 1 whole vanilla bean, split lengthwise
Equipment:
- Small saucepan
- Whisk or wooden spoon
- Airtight glass bottle or jar for storage
Instructions:
- In a small saucepan, combine the water and granulated sugar. If you are using a whole vanilla bean, add it to the saucepan now.
- Place the saucepan over medium heat. Whisk or stir occasionally until the sugar is completely dissolved. Do not let the mixture come to a rapid boil; a gentle simmer is all you need.
- Once the sugar is dissolved and the mixture is clear, remove the saucepan from the heat.
- If you are using vanilla extract or vanilla bean paste, now is the time to add it. Stir it in thoroughly. If you are using a whole vanilla bean, let it steep in the cooling syrup for at least 15 minutes to infuse the flavor. The longer it steeps, the stronger the vanilla flavor will be.
- Allow the syrup to cool completely to room temperature before pouring it into a clean, airtight container.
- If you used a whole vanilla bean, you can leave it in the storage jar to continue infusing the syrup, or you can remove the bean and save it for another use.
Part 3: Mastering the Art of Caramel Syrup from Scratch
Making caramel syrup is a little more involved than making simple syrup, but the result is a deeply flavorful, rich, and nutty liquid that is absolutely worth the effort. Unlike caramel sauce, which is thick and creamy and contains dairy, caramel syrup for coffee is dairy-free, thin enough to pour and mix easily, and perfect for drinks.
The Science of Caramelization: A Quick Look
Caramelization is a chemical process that occurs when sugar is heated. As the sugar molecules break down, they form new compounds that create a complex range of flavors, from buttery to nutty to slightly bitter. The key is to control the heat and the time to achieve the perfect golden-amber color and flavor profile without burning the sugar.
Step-by-Step Caramel Syrup Recipe
This recipe uses a dry caramel method, which is a classic technique for achieving a deep, nuanced flavor. It requires a little more attention but gives the best results.
Yields: Approximately 1 ½ cups Prep Time: 5 minutes Cook Time: 15-20 minutes Total Time: 30 minutes (including cooling)
Ingredients:
- 1 cup granulated white sugar
- ½ cup water, divided
- ½ cup hot water
- 1 teaspoon pure vanilla extract
- A pinch of salt (optional, for a salted caramel flavor)
Equipment:
- Medium heavy-bottomed saucepan or pot
- Whisk or wooden spoon
- Airtight glass bottle or jar for storage
Instructions:
- Combine the sugar and a quarter cup of the water in a heavy-bottomed saucepan. This will help the sugar melt more evenly. Place the pan over medium heat.
- Stir the mixture until the sugar has completely dissolved and a clear liquid forms. Once dissolved, stop stirring. You can swirl the pan occasionally to help it along, but avoid using a spoon, as this can encourage crystallization.
- Increase the heat to medium-high. Watch the mixture carefully as it begins to boil. The water will evaporate and the sugar will start to change color. This process can be fast, so stay by the stove.
- The sugar will first turn a light golden color, then a rich amber. Remove the pan from the heat as soon as it reaches your desired shade of amber. A deeper color will result in a more intense, slightly bitter flavor, while a lighter color will be sweeter and more buttery.
- Carefully and slowly pour in the hot water. Be extremely cautious, as the mixture will bubble up and release a significant amount of steam. Stand back and pour slowly to avoid splatters and burns.
- Whisk the mixture until the caramel is smooth and any hardened clumps have dissolved. If some caramel seizes up, you can return the pan to low heat and whisk until it becomes a smooth liquid again.
- Once smooth, stir in the vanilla extract and an optional pinch of salt for a salted caramel syrup.
- Allow the syrup to cool completely before transferring it to a clean, airtight container. The syrup will thicken as it cools.
Part 4: Beyond Vanilla and Caramel: Creative Flavoring Ideas
While vanilla and caramel are classics, the world of homemade simple syrups is vast and exciting. Once you’ve mastered the basics, you can start experimenting with other DIY coffee syrup recipes. Here are some popular ideas to inspire your creativity:
- Hazelnut Syrup: Toast raw hazelnuts in a dry pan until fragrant. Add them to your simple syrup base while it’s still warm and let them steep for 30-60 minutes. Strain the nuts before storing the syrup.
- Gingerbread Syrup: Infuse your simple syrup base with fresh ginger slices, cinnamon sticks, cloves, and a little nutmeg. Simmer for about 10 minutes to allow the spices to release their flavors.
- Lavender Syrup: Combine your simple syrup with culinary lavender buds. Simmer for a few minutes and then let the mixture steep until it cools. Strain out the lavender before bottling.
- Mint Syrup: This is perfect for mojitos or iced tea. Crush fresh mint leaves and add them to the simple syrup base after you’ve removed it from the heat. Let the mint steep for about 30 minutes.
- Spiced Maple Syrup: This is a wonderful alternative to traditional sugar-based syrups. Simply infuse a quality maple syrup with cinnamon sticks, star anise, and a few cloves. Gently warm the mixture and let it steep for an hour or so.
Part 5: Storage, Shelf Life, and Troubleshooting
Now that you’ve created your delicious syrup, proper storage is crucial to maintain its quality and safety.
How to Store Homemade Syrups
- Container: Use a clean, airtight glass bottle or jar. Glass is ideal because it doesn’t absorb flavors or odors.
- Refrigeration: All homemade syrups should be stored in the refrigerator. Unlike many commercial syrups that contain preservatives, your DIY syrups are perishable.
- Labeling: Be sure to label your containers with the flavor and the date it was made. This will help you keep track of its freshness.
Shelf Life
The shelf life of your syrup depends on a few factors, including the type of sugar used, the water-to-sugar ratio, and the flavoring agent.
- Simple Syrups (1:1 ratio): Typically last about 2-4 weeks in the refrigerator.
- Rich Syrups (2:1 ratio): The higher sugar content acts as a preservative, so these can last up to 6 months.
- Flavored Syrups: Syrups with fresh ingredients like fruits or herbs generally have a shorter shelf life (around 1-2 weeks), while those made with extracts or spices can last longer, often up to a month.
Troubleshooting Common Issues
- My syrup crystallized: This often happens if the sugar wasn’t fully dissolved or if a sugar crystal got stuck to the side of the pot. To fix this, gently re-warm the syrup and add a small amount of fresh water. Whisk until the crystals dissolve.
- My caramel syrup is too thick/thin: The thickness of caramel syrup is determined by how long you cook it. If it’s too thick, you can thin it out by whisking in a little hot water. If it’s too thin, you’ll need to cook it for a bit longer to reduce the liquid, but be careful not to burn it.
- My syrup has a cloudy appearance or mold: This means the syrup has gone bad. Discard it immediately. To prevent this, always use clean equipment and a sanitized container for storage.
Part 6: Creative Ways to Use Your DIY Syrups
Having a bottle of vanilla syrup and caramel syrup on hand opens up a world of culinary possibilities. Here’s a list of ideas to get you started:
- Coffee & Tea: The most obvious use! Add a spoonful to your morning coffee, a cold brew, a latte, or a tea. It’s the perfect way to replicate your favorite café drinks.
- Cocktails: Syrups are a key ingredient in many cocktails. Use vanilla syrup in an Old Fashioned for a twist, or caramel syrup in a dessert-inspired martini.
- Desserts: Drizzle your syrups over ice cream, pancakes, waffles, or a slice of cake. Caramel syrup is especially good on apple pie or cheesecake.
- Baked Goods: Syrups can be used to moisten cake layers, sweeten frosting, or as a glaze for pastries.
- Other Drinks: Stir into hot chocolate, milkshakes, or smoothies for a flavorful boost. Try adding a little vanilla syrup to a fruit smoothie for an extra layer of sweetness.
For more inspiration on drinks you can create, consider exploring popular resources like Allrecipes.com, which has a vast collection of cocktail and dessert recipes that can be adapted with your homemade syrups.
Your Kitchen, Your Creations
Making your own flavored syrups is a simple yet incredibly rewarding skill. It puts you in control of your ingredients and allows you to create flavors that are more vibrant, authentic, and delicious than anything you can buy in a store. From the straightforward sweetness of a classic vanilla syrup to the rich, complex notes of a caramel syrup, you now have the tools and knowledge to elevate your drinks, desserts, and culinary creations.
This journey into the world of DIY syrups is about more than just a sweet treat; it’s about connecting with what you consume and finding joy in the creative process. So grab your saucepan, get ready to experiment, and enjoy the delicious results. Your homemade syrups are more than just a liquid sweetener; they are a testament to your passion for good food and drink.
Disclaimer:
The information and recipes provided in this article are for educational and informational purposes only. While every effort has been made to ensure accuracy and safety, the user assumes all responsibility for any actions taken based on this content. Please exercise caution when working with hot sugar and liquids. It is always recommended to consult with a professional for specific dietary or health-related concerns.