The Quest for the Perfect Cup at Home
Ever dreamed of brewing coffee so good it transports you to your favorite café, right from your own kitchen? If you’re tired of mediocre drip coffee or inconsistent French press, then pour over coffee is your next great adventure. This simple, elegant brewing method is celebrated by baristas and coffee enthusiasts alike for its ability to unlock the brightest, cleanest, and most nuanced flavors from your beans.
But how do you master it without complex machinery or years of training?
In this article, we’ll demystify every step, from selecting the right equipment to mastering the crucial pouring technique, ensuring that every cup you brew is a testament to café-quality excellence. By the end, you’ll have the confidence and knowledge to consistently brew pour over coffee that truly shines.
Why Pour Over Coffee Dominates the Specialty Scene: An In-Depth Look at Flavor & Control
The rise of pour over coffee from niche brewing method to a global specialty staple is no accident. Its inherent design principles are geared towards maximizing flavor clarity and allowing the brewer an unprecedented level of control. Let’s peel back the layers and understand precisely why pour over has become the darling of the discerning coffee connoisseur and the aspiring home barista in 2025.
The Philosophy of Filtration and Extraction:
At its core, pour over is a filter brewing method. This simple fact is fundamental to its unique flavor profile. Unlike immersion methods like the French Press, where coffee grounds steep fully in water for an extended period, pour over involves continuously flowing water through a bed of coffee grounds, with the resulting brew passing through a paper (or sometimes cloth/metal) filter. This continuous flow and filtration process yields distinct advantages:
- Unrivaled Clarity and Cleanliness: The paper filter acts as a barrier, trapping insoluble solids, fines (tiny coffee particles), and oils that would otherwise end up in your cup. This results in a remarkably “clean” cup with zero sediment, allowing the true, delicate flavors of the coffee bean to shine through without any muddiness or heavy mouthfeel. If you’ve ever struggled with a gritty cup, pour over offers a pristine solution.
- Highlighting Nuance and Origin Characteristics: Because of this clarity, pour over excels at showcasing the unique characteristics imparted by a coffee’s origin, processing method, and roast level. The bright acidity of an Ethiopian Yirgacheffe, the berry notes of a natural-processed Colombian, or the deep chocolate undertones of a Brazilian bean are all accentuated. This makes pour over the preferred method for exploring the vast and complex world of specialty coffee beans.
- Dynamic Extraction: Unlike a static immersion brew, pour over involves a dynamic extraction. As water flows through the coffee bed, it continuously picks up soluble compounds. The fresh water constantly interacts with new surfaces of the coffee grounds, leading to a more efficient and layered extraction of desirable flavors.
The Brewer’s Command: Precision and Personalization:
Beyond the inherent design, pour over’s appeal lies in the active role of the brewer. This method doesn’t just make coffee; it encourages you to craft it.
- Granular Control Over Variables: Every element of the brewing process becomes a controllable variable:
- Water Temperature: Precisely controlled water temperature allows you to optimize extraction. Too cold, and you’ll under-extract, leading to sourness. Too hot, and you risk over-extraction and bitterness. Pour over enables you to hit that sweet spot.
- Grind Size: The fineness or coarseness of your grind directly impacts the surface area exposed to water and thus the extraction rate. Pour over allows for fine-tuning the grind to achieve optimal flow and flavor.
- Coffee-to-Water Ratio: Exactly how much coffee to how much water? This ratio is critical for brew strength and balance, and pour over allows for precise measurement.
- Pouring Technique (Flow Rate & Saturation): This is perhaps the most defining aspect. The speed and pattern of your pour dictate how evenly the coffee grounds are saturated and how quickly the water passes through. This hands-on control is what distinguishes a masterful pour over from a haphazard one.
- Brew Time: The total time from the first drop of water to the last drip is a cumulative outcome of all the above variables and a key indicator of proper extraction.
- Scalability and Adaptability: Whether you’re brewing a single, perfect cup for yourself or a larger batch for guests, pour over methods can be scaled up or down with relatively consistent results, provided you maintain your ratios and technique.
- The Meditative Ritual: For many, the deliberate nature of pour over is a cherished part of their day. The focus required to precisely weigh, grind, and pour transforms coffee making from a chore into a calming, sensory-rich experience. In our fast-paced world, this mindful moment is increasingly valued.
Beyond the Basics: Pour Over in the Modern Coffee Landscape (2025 Trends):
As we move deeper into 2025, the pour over method continues to evolve and integrate with new trends:
- Emphasis on Water Quality: The importance of filtered water, and even “designer” brewing water (water optimized with specific mineral content), is gaining traction, recognizing its profound impact on pour over flavor.
- “Hybrid” Brewing Approaches: Baristas are experimenting with combining elements of pour over with immersion (e.g., leaving a “slurry” for longer before final drawdown) to explore new flavor profiles.
- Advanced Data Tracking for Home Baristas: More sophisticated scales with Bluetooth connectivity and apps are allowing home users to track their pour rates, bloom times, and overall brew times with unprecedented precision, aiding in consistency and experimentation.
- Sustainable Practices: The use of reusable filters (metal, cloth) and a focus on responsibly sourced coffee beans are integral to the modern pour over ethos.
In essence, pour over coffee isn’t just about brewing a drink; it’s about engaging with the entire process, understanding the science, and savoring the art. It’s the ultimate tool for the home barista who wants to take their coffee seriously, without needing an industrial-sized setup.
Essential Gear for Your Home Pour Over Setup: Investing in Flavor
Building your perfect pour over setup doesn’t require a fortune, but it does demand thoughtful selection. Each piece of equipment plays a critical role in the final quality of your brew. Think of these as the foundational tools that empower you to consistently achieve café-quality results.
- The Pour Over Brewer (Dripper): Your Extraction Engine
The dripper is the heart of your pour over setup, dictating the shape of your coffee bed and influencing the water’s flow through the grounds. Different designs offer varying levels of forgiveness and accentuate different aspects of the coffee’s flavor.
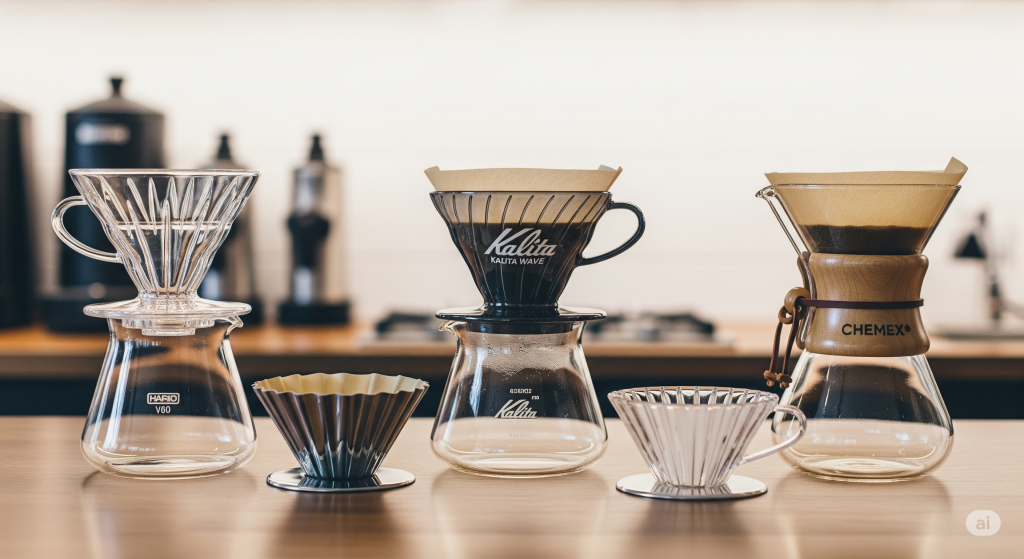
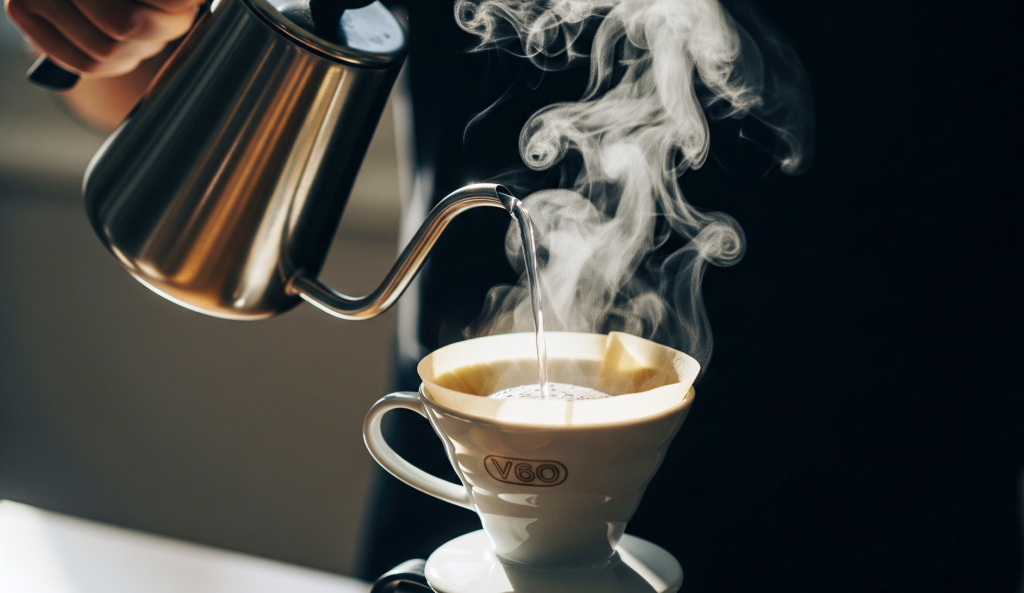
- Hario V60 (Conical):
- Design: A cone-shaped dripper with a large, single hole at the bottom and spiral ribs on the interior walls. Made from ceramic, glass, plastic, or metal.
- Characteristics: The large hole allows for a very fast flow rate, giving the brewer immense control over extraction speed. The ribs prevent the filter from sticking to the walls, promoting even airflow and drainage.
- Flavor Profile: Tends to produce a clean, bright, and highly acidic cup, highlighting delicate floral and fruity notes. It can be less forgiving due to its fast flow, requiring more precise pouring technique.
- Best For: Experienced home baristas seeking maximum control and clarity, or those willing to put in the practice to master it. Ideal for showcasing light-roasted, nuanced specialty coffee beans.
- Kalita Wave (Flat-Bottomed):
- Design: Features a flat bottom with three small extraction holes, resembling a small basket. Available in stainless steel, glass, and ceramic.
- Characteristics: The flat bed promotes more even extraction across the coffee grounds compared to conical drippers, as water drains more uniformly. The three holes also slow down the flow rate, making it more forgiving.
- Flavor Profile: Known for producing a balanced, consistent, and well-rounded cup. It’s less prone to channeling (when water finds preferential paths through the coffee bed).
- Best For: Beginner home baristas looking for consistency and ease of use, or anyone prioritizing a balanced, repeatable brew.
- Chemex (Hourglass-Shaped Brewer):
- Design: A distinctive hourglass-shaped vessel with a polished wood collar and a tie. It uses proprietary, significantly thicker paper filters.
- Characteristics: The unique design means the brewer is the carafe. Its extra-thick filters provide exceptional filtration, removing more insoluble solids and oils than other paper filters.
- Flavor Profile: Produces an incredibly clean, crisp, and often “tea-like” cup with virtually no sediment or bitterness. It can sometimes mute some of the body due to extensive filtration.
- Best For: Those who prioritize extreme cleanliness and bright, unadulterated flavor. Excellent for light-roasted coffees where clarity is paramount. Also a beautiful piece of design for any kitchen.
- AeroPress (Immersion-Filter Hybrid):
- Design: A plunger-style brewer that can function as a pour over (inverted method) or full immersion. Uses small, circular paper filters.
- Characteristics: Extremely versatile, durable, and portable. Can brew concentrated “espresso-style” shots or larger, full-bodied cups.
- Flavor Profile: Highly dependent on method, but can yield clean, rich, and full-bodied brews.
- Best For: Travelers, campers, small kitchens, or home baristas seeking versatility and durability.
Recommendation: If you’re starting your home barista journey with pour over, a Kalita Wave often provides a more forgiving and consistent experience, building confidence. As your skills develop, exploring the Hario V60 offers a deeper dive into precision and control.
- High-Quality Burr Grinder: The Unsung Hero of Flavor
This is arguably the single most important piece of equipment after your coffee beans. A grinder directly impacts the consistency of your extraction, and thus, the quality of your cup.
- Why Burr Grinders?
- Uniform Grind: A burr grinder (either conical or flat burrs) crushes coffee beans between two abrasive surfaces, producing a highly consistent particle size. This uniformity is paramount for even extraction.
- Even Extraction: When all coffee particles are roughly the same size, water flows through them evenly, extracting soluble compounds at a similar rate. This prevents over-extraction of fines (leading to bitterness) and under-extraction of coarser particles (leading to sourness).
- Flavor Potential: Without a consistent grind, even the most expensive specialty coffee beans will fall short of their potential.
- Avoid Blade Grinders: These are not grinders; they are choppers. They smash beans with spinning blades, creating an inconsistent mix of fine powder and large chunks. This leads to wildly uneven extraction and a poor-tasting brew. Do NOT use a blade grinder for pour over.
- Types of Burr Grinders for Home Use:
- Manual Hand Grinders:
- Pros: Portable, generally more affordable entry point to quality burrs, quiet operation, good for single servings.
- Cons: Can be slow and physically demanding for multiple cups.
- Recommendation: Excellent for beginner home baristas on a budget or those prioritizing portability. Look for models from brands like Comandante, Timemore, 1Zpresso, or Hario (for basic needs).
- Electric Burr Grinders:
- Pros: Fast, convenient, consistent, often have larger capacities.
- Cons: More expensive, can be noisy.
- Recommendation: A must-have for daily brewing or multiple servings. Look for models with a wide range of grind settings specifically for filter coffee. Popular choices include Baratza Encore, Fellow Ode, or more advanced models like the Niche Zero (though primarily for espresso, it excels at filter too).
- Manual Hand Grinders:
Investment Tip: If your budget is tight, invest in a quality burr grinder before upgrading your dripper or kettle. A great grinder will improve any brewing method.


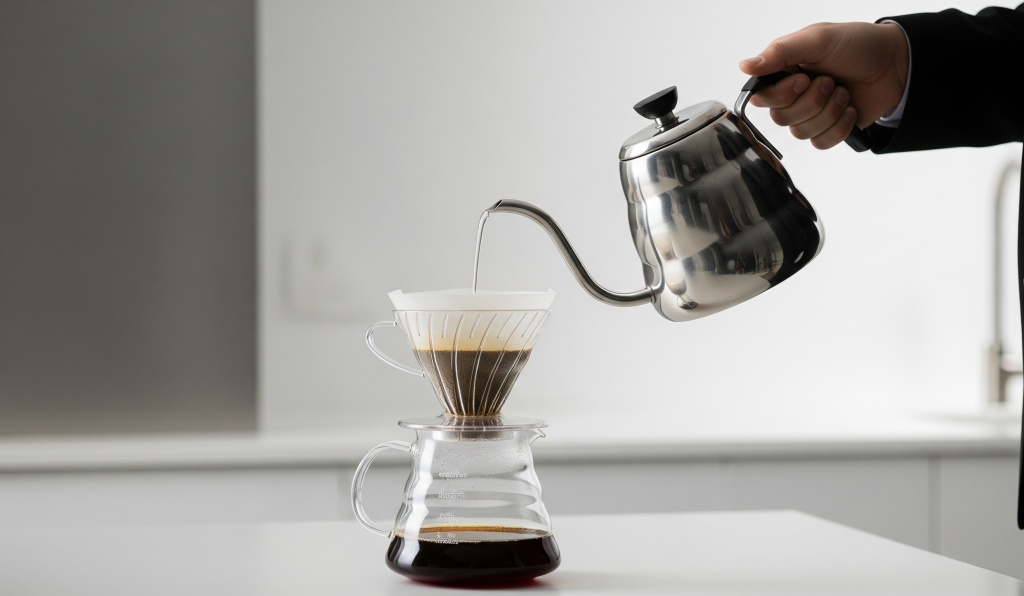
- Gooseneck Kettle: The Conductor of Water Flow
The humble kettle transforms into a precision instrument when it has a gooseneck spout.
- Precision Pouring Control: The long, slender, curved spout gives you unparalleled control over the speed, direction, and consistency of your water pour. This is crucial for saturating the coffee bed evenly and executing specific pouring patterns (like spirals) without disturbing the grounds too much.
- Temperature Control:
- Standard Kettles: You can boil water and then let it sit for 30−60 seconds to reach the optimal brewing temperature range (195−205∘F/90−96∘C).
- Electric Variable Temperature Kettles: These are highly recommended. They allow you to set the exact desired temperature and maintain it, eliminating guesswork and ensuring consistent results.
- Materials: Stainless steel is common, but various finishes are available.
- Recommendation: A variable temperature gooseneck kettle is a game-changer for pour over. Brands like Fellow Stagg EKG, Hario Buono, and Bonavita are popular choices.
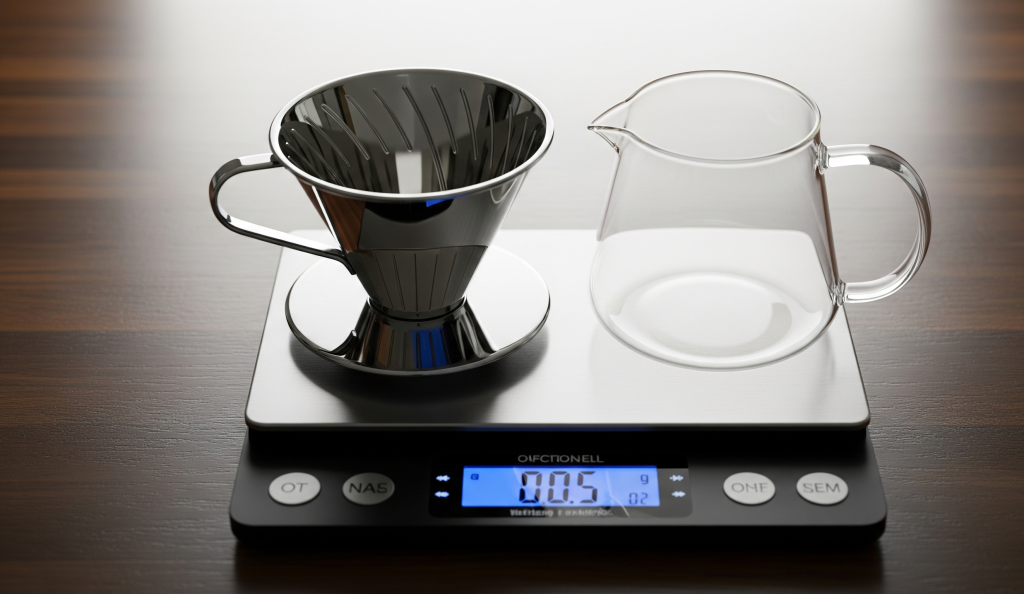
- Digital Scale with Timer: The Architect of Consistency
Brewing coffee by volume (e.g., scoops) is wildly inconsistent because coffee beans vary in density. A digital scale is non-negotiable for reproducible, delicious results.
- Precision by Weight:
- Coffee Dose: Weighing your coffee beans ensures you use the precise amount required for your desired strength, regardless of bean density.
- Water Volume: Weighing your water is far more accurate than measuring cups, as 1 gram of water equals 1 milliliter. This guarantees your desired coffee-to-water ratio.
- Integrated Timer: Many coffee scales designed for brewing include a built-in timer. This allows you to simultaneously weigh your water pours and track your bloom time and total brew time, streamlining the process.
- Accuracy and Features: Look for a scale that measures in 0.1-gram increments for maximum precision, has a fast response time, and ideally, a silicone mat to protect it from splashes.
- Recommendation: Hario V60 Drip Scale, Acaia Pearl (premium), or various affordable options from brands like Timemore or Coffee Gator.
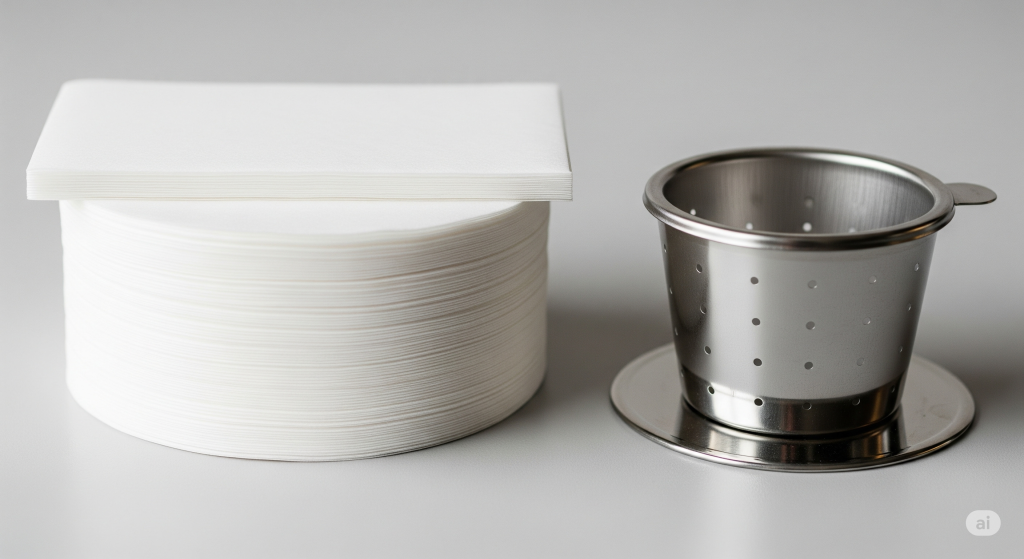
- Filters: The Unsung Hero of Clarity
The filter is what makes pour over coffee so uniquely clean.
- Type Specificity: Always use filters designed for your specific brewer. A V60 filter won’t work optimally in a Kalita Wave, and vice-versa. Chemex uses its own specialized, thicker filters.
- Paper Filters:
- Pros: Most common, remove almost all sediment and oils, leading to a clean, bright cup. Disposable and convenient.
- Cons: Can impart a “papery” taste if not rinsed thoroughly. Create waste.
- Recommendation: Opt for oxygen-bleached or natural brown filters. Always rinse thoroughly with hot water before brewing.
- Reusable Filters (Metal/Cloth):
- Pros: Eco-friendly, no paper taste, allow some oils and fines through for a fuller body (metal).
- Cons: Can be harder to clean, may result in a less “clean” cup (more sediment/fines), cloth filters need careful maintenance.
- Recommendation: A great option for reducing waste, but understand they will yield a different cup profile.
- Freshly Roasted Coffee Beans: The Soul of Your Brew
No matter how perfect your equipment or technique, sub-par beans will yield a sub-par cup.
- Freshness is Paramount: Coffee is a perishable agricultural product. It’s at its peak flavor within 1-3 weeks (sometimes up to 4-5 weeks for darker roasts) after its roast date. Avoid beans without a roast date, or those that are months old.
- Whole Bean is Best: Always buy whole bean coffee and grind it just before brewing. Pre-ground coffee oxidizes rapidly, losing much of its aroma and flavor within minutes.
- Specialty Grade: Look for specialty coffee beans from reputable roasters. These beans are meticulously grown, processed, and roasted to highlight unique flavors.
- Exploring Roasts & Origins:
- Light Roasts: Often showcase vibrant acidity, floral, and fruity notes. Excellent for pour over.
- Medium Roasts: Balanced, with notes of chocolate, nuts, and caramel. Versatile for pour over.
- Dark Roasts: Bold, smoky, often with notes of dark chocolate. Can be delicious but require careful brewing to avoid bitterness.
Key takeaway: Invest in a quality burr grinder and fresh, specialty coffee beans. These two elements will have the most profound impact on your pour over quality. The rest of the equipment enhances consistency and control.
The Perfect Pour Over Recipe: Step-by-Step Guide: –
Now that you have your essential gear, it’s time for the main event: brewing. This step-by-step guide is designed to provide a solid foundation for consistently excellent pour over. While coffee brewing is an art with endless variables, this recipe provides a precise starting point that yields delicious results for most specialty coffee beans.
The Golden Ratio: Recommended Starting Point
For pour over, a coffee-to-water ratio is expressed as 1 part coffee to X parts water. Our recommended starting point is 1:16 (one part coffee to sixteen parts water). This is a widely accepted ratio that balances strength and clarity.
- Example Calculation:
- If you’re using 20 grams (g) of coffee, you’ll need 20 g coffee×16=320 g water.
- If you’re using 25 grams (g) of coffee, you’ll need 25 g coffee×16=400 g water.
Key Parameters (Consider as initial targets):
- Coffee-to-Water Ratio: 1:16 (adjust to 1:15 for stronger, 1:17 for lighter)
- Grind Size: Medium-fine. Think consistency of coarse sand or sea salt. It should feel slightly gritty between your fingers, not powdery or chunky.
- Water Temperature: 195−205∘F (90−96∘C). This range optimizes the dissolution of desirable flavors.
- Total Brew Time: Aim for 2:30−3:30 minutes from the moment water hits coffee to the last drip. This can vary slightly based on your specific dripper and the bean’s density.
The Step-by-Step Pour Over Process:
This is where the precision of your gooseneck kettle and digital scale truly shine.
- Heat Your Water & Prep Your Kettle (0:00 – Prep Phase):
- Fill your gooseneck kettle with fresh, filtered water. Water quality is surprisingly impactful on flavor – hard, chlorinated tap water can mute delicate notes.
- Heat the water to your target temperature of 195−205∘F (90−96∘C). If you don’t have a variable temperature kettle, bring it to a boil and then let it sit for 30−60 seconds off the heat to cool slightly.
- Why this matters: Consistent temperature ensures consistent extraction. Too cold, and you’ll under-extract (sour coffee); too hot, and you’ll over-extract (bitter coffee).
- Weigh & Grind Your Beans (Pre-Brew Setup):
- Place your empty carafe/mug on your digital scale, then place your dripper on top.
- Weigh your whole coffee beans to your desired amount (e.g., 20g).
- Grind your coffee immediately before brewing to your medium-fine setting using your burr grinder. Grinding fresh preserves volatile aromatic compounds.
- Why this matters: Precision by weight is fundamental for repeatable results. Freshly ground coffee maximizes flavor potential.
- Prepare Your Filter & Rinse (Pre-Brew Setup):
- Place the paper filter securely into your dripper. Ensure it sits flush against the walls.
- Carefully pour some of your hot, preheated water over the filter, thoroughly saturating it. This achieves two critical things:
- Removes Paper Taste: Rinses away any papery flavors that could taint your delicate brew.
- Preheats Equipment: Warms your dripper and carafe/mug, preventing the brewing temperature from dropping prematurely when the coffee hits.
- Discard the rinse water completely before proceeding.
- Add Coffee Grounds & Tare Your Scale (0:00 – Ready to Brew):
- Transfer your freshly ground coffee into the rinsed filter. Gently shake the dripper to settle the grounds into a flat, even bed. Avoid tapping too aggressively, which can cause fines to migrate to the bottom.
- Place the entire setup (carafe/mug with dripper and coffee) back onto your digital scale and tare (zero out) the scale.
- Why this matters: A flat bed ensures even water contact. Taring the scale allows you to accurately measure your water pours from this point forward.
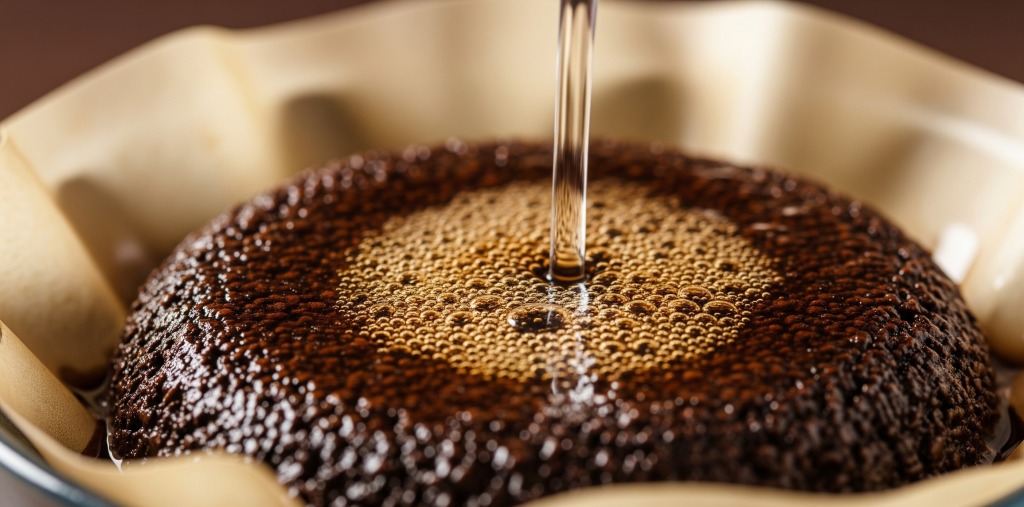
- The Bloom (First Pour: 0:00−0:45):
- Start your timer immediately as you begin pouring your first bit of water.
- Gently pour approximately twice the weight of your coffee in water over the grounds (e.g., for 20g coffee, pour 40g water).
- Pour in a slow, circular motion, ensuring all grounds are evenly saturated. Aim to get all the grounds wet without seeing any dry spots.
- Allow the coffee to “bloom” for 30−45 seconds. During this phase, you’ll see the coffee bed expand and bubble as carbon dioxide (CO2) escapes.
- Why this matters: The bloom is crucial for proper extraction. Freshly roasted coffee contains CO2; releasing it prevents uneven channels from forming during later pours and allows water to more effectively penetrate the coffee particles for better flavor extraction. Think of it as waking up the coffee!
- The Main Pours (Successive Pours: 0:45−2:30):
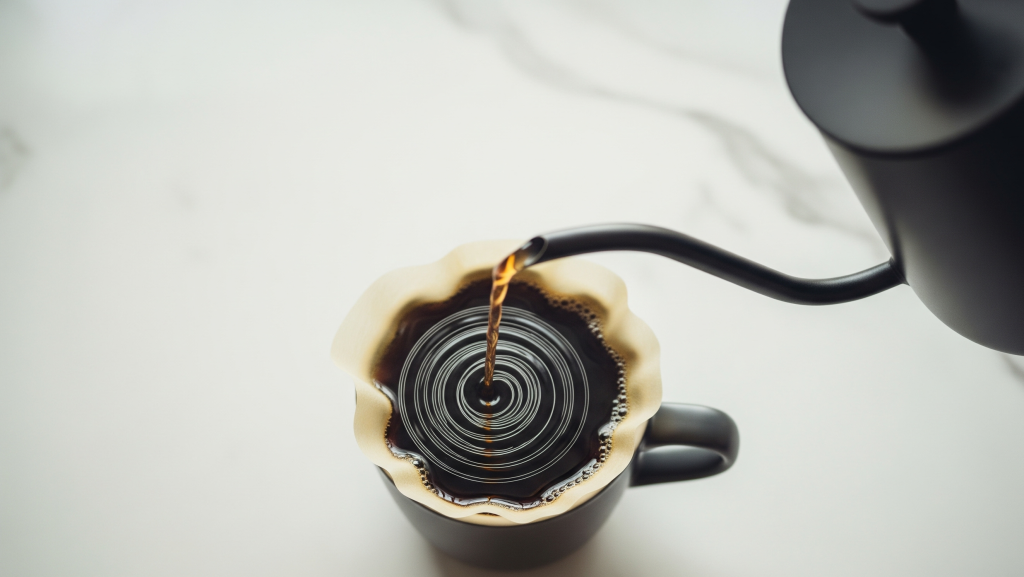
- After the bloom, continue pouring hot water in stages. The goal is to maintain an even saturation of the coffee bed, avoiding dry spots or excessive turbulence that could lead to uneven extraction.
- Pouring Technique: Use your gooseneck kettle to pour slowly and steadily in concentric circles, starting from the center of the coffee bed and spiraling outwards, then back to the center. Avoid pouring directly onto the filter paper walls, as this can create channels and bypass the coffee grounds.
- Recommended Pouring Stages (for 320g total water):
- Second Pour (0:45−1:00): Begin your second pour at 0:45 seconds. Pour slowly until your scale reads around 120g total water. This should take about 15 seconds.
- Third Pour (1:30−1:45): Once the water level has dropped slightly (around 1:30 on your timer), begin your third pour. Continue pouring slowly until your scale reads approximately 220g total water.
- Fourth Pour (2:15−2:30): Around 2:15 on your timer, begin your final pour. Pour until you reach your target total water weight (e.g., 320g).
- Allow the water to drain slightly between each pulse pour. This technique helps maintain a consistent water level and prevents the coffee bed from becoming too agitated.
- Why this matters: Controlled, segmented pours allow for continuous, even extraction, ensuring all desirable compounds are dissolved without over-extracting bitter notes.
- The Drawdown ($2:30 – 3:30+):
- Once you’ve reached your target water weight, cease pouring. Allow the remaining water to fully drain through the coffee bed.
- Monitor your timer. Your total brew time (from the start of the bloom to the last drip) should ideally fall between 2:30 and 3:30 minutes.
- Why this matters: The drawdown time is a critical indicator of your grind size and overall extraction. If it’s too fast, your grind might be too coarse; too slow, and it’s likely too fine.

- Serve and Enjoy!
- Once the water has completely drained, carefully remove the dripper (and discard the filter and grounds).
- Give your brewed coffee a gentle swirl in the carafe to mix and homogenize the layers of brew. This ensures a consistent taste from the first sip to the last.
- Pour into your preheated mug (remember that initial filter rinse water? It warmed your mug too!).
- Sip and savor the clean, complex flavors of your perfectly brewed pour over!
Troubleshooting Your Pour Over: Common Issues
Even with a meticulous recipe, the journey to pour over perfection involves trial and error. Understanding how to diagnose and fix common problems is a hallmark of an expert home barista. Don’t get discouraged by a less-than-perfect cup; see it as an opportunity to learn and refine.
The Golden Rule of Troubleshooting: Change One Variable at a Time! When your coffee doesn’t taste right, resist the urge to change everything at once. Isolate one variable (e.g., grind size, water temperature, ratio) and adjust it incrementally. This allows you to understand the specific impact of each change.
- “My Coffee Tastes Sour, Weak, or Under-extracted.” This is a very common issue, especially for beginners. It means you haven’t dissolved enough desirable compounds from the coffee grounds.
- Symptoms:
- Sharp, tart, or lemon-like acidity that isn’t pleasant.
- Lacks sweetness and depth.
- Thin body, watery mouthfeel.
- Quick drawdown time (water flows through too fast).
- Possible Causes & Solutions:
- Grind is Too Coarse: This is the most frequent culprit. Water flows too quickly, and doesn’t have enough time or surface area to extract flavor.
- Solution: Grind finer. Make small adjustments on your burr grinder and re-brew. Aim for a slightly longer brew time.
- Water Temperature is Too Low: Cold water can’t dissolve compounds effectively.
- Solution: Ensure your water is between 195−205∘F (90−96∘C). Preheat your kettle, dripper, and mug properly.
- Brew Time is Too Short: Water passes through too quickly.
- Solution: If your grind is correct, try a slower, more deliberate pour. Increase the total brew time by allowing the water to drain slightly more between pours.
- Insufficient Coffee-to-Water Ratio: Too much water for too little coffee.
- Solution: Ensure you’re using the correct coffee-to-water ratio (e.g., 1:16). Increase your coffee dose slightly.
- Uneven Wetting/Blooming: Dry pockets in the coffee bed lead to under-extraction in those areas.
- Solution: Ensure a thorough, gentle bloom, fully saturating all grounds. Improve your pouring technique to cover the entire bed evenly.
- Grind is Too Coarse: This is the most frequent culprit. Water flows too quickly, and doesn’t have enough time or surface area to extract flavor.
- “My Coffee Tastes Bitter, Astringent, or Over-extracted.” This means you’ve dissolved too many undesirable compounds from the coffee, often the bitter, less pleasant ones.
- Symptoms:
- Harsh, burnt, rubbery, or chalky taste.
- Leaves a dry, unpleasant sensation on your tongue (astringency, like eating unripe fruit).
- Heavy body, sometimes gritty.
- Slow drawdown time (water flows through too slowly).
- Possible Causes & Solutions:
- Grind is Too Fine: This is the most common cause. Water has too much surface area to extract from, and contact time is too long.
- Solution: Grind coarser. Make small adjustments on your burr grinder and re-brew. Aim for a slightly shorter brew time.
- Water Temperature is Too High: Excessively hot water can “burn” the coffee and extract undesirable compounds too quickly.
- Solution: Ensure your water is within the optimal range of 195−205∘F (90−96∘C). Let boiling water cool for a bit longer.
- Brew Time is Too Long: Water is in contact with the grounds for an excessive period.
- Solution: If your grind is correct, try a faster pour. Ensure you’re not pouring too slowly, which prolongs contact time.
- Turbulence/Channeling: Pouring too aggressively can create channels, leading to some parts of the coffee bed being over-extracted.
- Solution: Use a gentle, controlled circular pour. Avoid digging the kettle spout into the coffee bed.
- Too Much Coffee-to-Water Ratio: Too much coffee for the amount of water.
- Solution: Ensure your ratio is correct. Reduce your coffee dose slightly if the issue persists with other adjustments.
- Grind is Too Fine: This is the most common cause. Water has too much surface area to extract from, and contact time is too long.
- “My Water Drains Too Fast.” If your entire brew finishes significantly faster than 2:30 minutes, you’re likely missing out on flavor.
- Primary Cause: Grind is too coarse. The large particles allow water to pass through too easily.
- Solution: Grind significantly finer.
- “My Water Drains Too Slow (Clogging).” If your brew extends well beyond 3:30-4:00 minutes and the water seems to be stuck, you have a flow problem.
- Primary Causes:
- Grind is Too Fine: The particles are so small they create a dense, impermeable bed that chokes the flow.
- Too Many Fines: Even with a good burr grinder, some “fines” (tiny dust-like particles) are produced. Too many fines can clog the filter.
- Filter Type: Some filters (e.g., thicker Chemex filters) naturally have slower flow.
- Aggressive Pouring: Stirring or pouring too vigorously can cause fines to migrate to the bottom of the filter, creating a “sludge” layer that restricts flow.
- Solutions:
- Grind Coarser: This is usually the first step.
- Reduce Fines: If your grinder produces a lot of fines, you might try a sifter (though most home baristas don’t go this far). A better quality grinder often produces fewer fines.
- Gentler Pouring: Be very gentle, especially during the bloom and initial main pours, to avoid disturbing the coffee bed.
- Change Filter/Brewer: If all else fails, consider if your filter or brewer is inherently slow for your desired flow.
- “My Coffee Tastes Flat, Hollow, or Lacks Character.” This is often a sign of uneven extraction or using old/low-quality beans.
- Possible Causes & Solutions:
- Old Beans: The most common culprit. Volatile aromatics have degraded.
- Solution: Ensure you’re using freshly roasted coffee beans (within 1-4 weeks of roast date).
- Uneven Grind: Blade grinders are notorious for this, but even a poor burr grinder can produce inconsistent particles.
- Solution: Invest in a high-quality burr grinder.
- Uneven Saturation/Pouring: Water bypassing certain parts of the coffee bed.
- Solution: Focus on even saturation during the bloom and consistent, concentric circular pours. Avoid pouring directly down the sides of the filter.
- Water Quality: Tap water with high mineral content or chlorine can mask flavors.
- Solution: Use filtered water.
- Insufficient Bloom: Not allowing enough CO2 to escape can lead to uneven extraction.
- Solution: Ensure a full, 30−45 second bloom where all grounds are saturated.
- Old Beans: The most common culprit. Volatile aromatics have degraded.
Troubleshooting Mindset: Approach each brew as an experiment. Keep notes on your variables (coffee weight, water weight, temperature, grind setting, total brew time, and resulting taste). This systematic approach will rapidly improve your skills and consistency as a home barista.
Elevate Your Pour Over Game: Tips For Aspiring Home Barista
Once you’ve mastered the fundamentals, the world of pour over opens up to exciting advanced techniques and considerations. These tips are for the home barista ready to delve deeper into the nuances of extraction and truly personalize their perfect cup.
- The Science of Water: Beyond Just “Filtered”
While using filtered water is a vast improvement over tap, the composition of your water significantly impacts flavor.
- Minerals Matter: Water contains various minerals (like calcium and magnesium) that react with coffee compounds. Ideal brewing water typically has a moderate amount of these minerals. Too few, and your coffee can taste flat; too many, and it can taste chalky or muddy.
- pH Balance: Water pH also plays a role. Slightly alkaline water can dull acidity, while very acidic water can overemphasize it.
- Home Solutions:
- Brita/Pur Pitchers: Good basic filtration, removing chlorine and some impurities.
- Third-Wave Water/Global Customized Water: These are mineral packets or drops that you add to distilled water, precisely crafting the ideal water chemistry for coffee brewing. They are a game-changer for serious enthusiasts.
- Specific Bottled Waters: Some bottled waters (like Crystal Geyser Alpine Spring Water, specific to certain regions) have ideal mineral compositions for coffee.
![]()
- Mastering the Pouring Technique: The Art of Agitation
Your pour isn’t just about wetting the grounds; it’s about controlling agitation and managing the coffee bed.
- The Bloom (Revisited): Don’t rush this. A vigorous bloom ensures all grounds are saturated. Some baristas even give a gentle stir with a spoon during the bloom to ensure complete saturation, especially with larger doses.
- Controlled Spirals: Practice maintaining a consistent spiral motion from the center outwards, then returning to the center. Avoid pouring directly on the filter paper walls, as this creates channels and bypasses the coffee grounds.
- Pulse Pouring vs. Continuous Pouring:
- Pulse Pouring: Our step-by-step recipe uses pulse pours (segmented pours with pauses). This allows the water level to drop, promoting better oxygenation and preventing the coffee bed from being overly disturbed. It offers more control over agitation.
- Continuous Pouring: A more advanced technique where you maintain a constant, slow stream of water. This requires exceptional precision and a very consistent grind, but can yield incredibly smooth, even extractions.
- The “WDT” Technique (Weiss Distribution Technique) for Pour Over? While primarily for espresso, some enthusiasts adapt a gentle version for pour over. After adding grounds, use a thin needle tool to gently stir and break up clumps, ensuring an even bed before the bloom. This can help with difficult beans or grind consistency issues.
- Video idea: A short video clip demonstrating precise pour-over technique, showing the circular motion and control from the gooseneck kettle.
- Understanding Brew Time and Grind Adjustment: Your Primary Levers
Your total brew time is a critical indicator of extraction. It’s the most common “lever” you’ll pull to fine-tune your coffee after setting your ratio and temperature.
- Too Fast ($<$2:30 min): Usually means your grind is too coarse, leading to under-extraction (sour/weak). Grind finer.
- Too Slow ($>$3:30 min): Usually means your grind is too fine, leading to over-extraction (bitter/astringent) or clogging. Grind coarser.
- The Grind/Time Relationship: Think of grind size and brew time as inversely related. If you want a longer contact time, you make the grind finer (which slows down flow). If you want a shorter contact time, you make the grind coarser (which speeds up flow).
- Record Everything: Maintain a brew log. Note down the coffee type, roast date, coffee weight, water weight, temperature, grind setting (from your specific grinder), pour times, total brew time, and resulting taste. This data is invaluable for diagnosing problems and replicating successful brews.
- The Pre-Infusion/Bloom (Expanded): CO2 Release and Flavor Development
We covered the bloom in the basic steps, but let’s emphasize its importance.
- Why CO2 Matters: Freshly roasted coffee contains a significant amount of CO2, a byproduct of the roasting process. If this gas isn’t allowed to escape during the bloom, it can create air pockets and channels within the coffee bed, leading to uneven extraction.
- The “Sweet Spot” for Bloom: Aim for a 30−45 second bloom. Too short, and you might not degas fully. Too long, and your coffee might cool down too much, leading to under-extraction in later stages.
- Visual Cues: Watch for the coffee bed to swell and bubbles to appear. This “puffing up” is a good sign of active degassing.
- Temperature Control: The Nuance of Heat
While 195−205∘F (90−96∘C) is the general sweet spot, fine-tuning temperature can further optimize certain beans.
- Lighter Roasts: Often benefit from slightly higher temperatures (closer to 205∘F/96∘C) to help fully extract their complex acids and bright flavors.
- Darker Roasts: May benefit from slightly lower temperatures (closer to 195∘F/90∘C) to minimize the extraction of bitter compounds.
- Maintaining Temperature: Preheating your entire setup (dripper, carafe, mug) with hot water is crucial to prevent rapid temperature drops during the brew cycle.
- Understanding Your Coffee Beans: Origin, Roast, and Processing
Becoming an advanced home barista means understanding your raw material.
- Origin: Coffees from different regions (e.g., Ethiopia, Colombia, Kenya, Brazil) have distinct flavor profiles due to their varietals, climate, and soil. Researching origins can help you anticipate flavors.
- Roast Level:
- Light Roasts: Best for pour over, highlighting origin characteristics, acidity, and delicate notes. They require precise brewing.
- Medium Roasts: Balanced, versatile, often sweet and nutty.
- Dark Roasts: Can be tricky for pour over due to increased bitterness potential, but can yield bold, smoky cups if brewed carefully (often at lower temperatures).
- Processing Method (Washed, Natural, Honey): This refers to how the coffee cherry is processed after harvest, significantly impacting flavor.
- Washed: Clean, bright, acidic (e.g., many Central American coffees).
- Natural (Dry): Fruity, jammy, full-bodied (e.g., many Ethiopian, Brazilian coffees).
- Honey: Sweet, balanced, between washed and natural.
- Roast Date: Always prioritize coffee with a recent roast date. This is the single most important factor for flavor.
- The “Wet” and “Dry” Coffee Bed: Visual Cues for Extraction
Observe your coffee bed during and after brewing.
- During Brewing: A healthy pour over brew should have an evenly saturated “wet” coffee bed with water draining uniformly. If you see dry channels or parts of the bed not getting wet, your pouring or agitation needs adjustment.
- After Brewing: A perfectly extracted coffee bed should be relatively flat, with grounds evenly distributed, almost like a damp sandcastle. If you see deep craters or a steep slope, it suggests uneven flow and potential channeling.
- Advanced Tools and Accessories:
- Refractometer: For the truly obsessive, a coffee refractometer measures the Total Dissolved Solids (TDS) in your brew, giving you an objective measure of extraction yield. This is a pro tool, but increasingly accessible.
- Coffee Subscription Boxes: A fantastic way to explore diverse specialty coffee beans from different roasters, expanding your palate and understanding.
- Dedicated Cleaning Kits: Investing in specific brushes, descaling solutions, and grinder cleaners (like Grinderz or Grindz) ensures your equipment performs optimally and lasts longer.
By embracing these advanced tips, you’ll move beyond simply brewing coffee to truly understanding and manipulating the extraction process. This journey of continuous learning and refinement is what makes being a home barista so incredibly rewarding.
Important Note: Your Journey to Pour Over Perfection is Just Beginning
You’ve embarked on a remarkable journey – one that transforms a simple beverage into an exquisite daily ritual. Mastering the art of pour over coffee at home is not just about acquiring the right equipment; it’s about cultivating precision, understanding the subtle science of extraction, and developing a keen palate.
From selecting the ideal burr grinder to understanding the nuances of water temperature and the rhythm of your pour, every step contributes to the symphony of flavors in your cup. We’ve equipped you with the comprehensive knowledge to:
- Choose the right gear: Understanding the purpose of each essential tool.
- Execute a flawless brew: Following a precise step-by-step recipe for consistent results.
- Troubleshoot with confidence: Diagnosing and fixing common flavor issues like a seasoned pro.
- Elevate your skills: Exploring advanced techniques to unlock even greater complexity and clarity in your coffee.
Remember, every brew is an opportunity to learn. Embrace the process, keep meticulous notes, and don’t be afraid to experiment. Your palate is your ultimate guide, and the joy of crafting a truly exceptional cup of coffee, exactly to your liking, is a deeply satisfying experience.
So, go forth, home barista, with your newfound knowledge. Grind those freshly roasted coffee beans, heat that water, and prepare to pour over your way to a deeper appreciation for one of the world’s most beloved beverages. The aroma of your perfectly brewed coffee awaits.